
Welcome to part two of our series on profiling and optimizing CPU-bound tasks in Node.js! In the first installment, we discussed the complexities of handling CPU-bound tasks in Node.js, shedding light on their impact on runtime performance and exploring various profiling techniques.
Once you've used profiling to figure out where the bottleneck in your application is, the next step is to choose the right optimization strategy to obtain an acceptable level of performance for your use case.
In this second and final part of our series, we'll explore a few strategies you can adopt to improve the performance of CPU-bound tasks in Node.js. We'll also briefly discuss how to continuously monitor your application in production to maintain its efficiency and responsiveness over time.
Let's get started!
1. Using Worker Threads in Node.js
Since Node.js v10.5.0, using worker threads has been the recommended approach for improving the performance of CPU-bound tasks. Worker threads allow you to perform CPU-bound tasks concurrently, leveraging multiple CPU cores within a single Node.js process.
Each worker thread runs in its isolated context, including its own V8 instance, memory space, and resources. This isolation prevents shared data issues and allows for safer parallel execution.
While worker threads have isolated memory spaces, they can communicate and share
data with the main thread or other workers using inter-thread communication
mechanisms like postMessage() and onmessage events.
Improve CPU-bound Task Performance with Worker Threads
To see how worker threads can help with improving the performance of CPU-bound
tasks, examine the code in the src/worker.js file:
// src/worker.js
import { parentPort, workerData } from "node:worker_threads";
import { calcFiboRecursive } from "./fibonacci.js";

const result = calcFiboRecursive(workerData);
parentPort.postMessage(result);
This file contains code that will be executed in a separate worker thread.
The parentPort object is a reference to the communication port between the
current worker thread and its parent thread, and it allows bidirectional
communication between both threads. Here, once the Fibonacci number is computed,
the result is sent to the parent thread through the postMessage() method.
Using workerData
The workerData property, on the other hand, allows you to pass any JavaScript
value to the worker thread on creation. In this case, the workerData is
the Fibonacci number that will be computed.
Return to the server.js file and examine the /fibonacci-worker-thread/:n
route:
// src/server.js
import { Worker } from 'node:worker_threads';

. . .

fastify.get('/fibonacci-worker-thread/:n', (request, reply) => {
  const n = parseInt(request.params.n, 10);

  const worker = new Worker(path.join(__dirname, 'worker.js'), {
    workerData: n,
  });

  worker.once('message', (result) => {
    reply.send({ result });
  });

  worker.on('error', (err) => {
    throw err;
  });
});
The Worker class represents an independent JavaScript execution thread. To
create a new worker, you must pass the path to the main script of the worker
(src/worker.js). Optionally, you can also pass a value to the worker thread
through the workerData property. The value will be cloned and made available
to the worker script.
Once you've created a worker thread, you must listen for the message event on
the worker so that you can act on messages sent from the worker script (using
postMessage()). In this case, the expected message is the computation result
from the calcFiboRecursive() function.
Uncaught errors from worker threads can also be handled by listening for the
error event and handling the error accordingly.
In Fastify,
uncaught errors in routes are automatically logged, and a 500 response is sent to
the client.
The Effect Of Node Worker Threads
Let's see the effect of worker threads on the Fibonacci computation by
simulating traffic to the /fibonacci-worker-thread/:n route as follows:
autocannon --renderStatusCodes http://localhost:3000/fibonacci-worker-thread/30
. . .
┌──────┬───────┐
│ Code │ Count │
├──────┼───────┤
│ 200  │ 1341  │
└──────┴───────┘

Req/Bytes counts sampled once per second.
# of samples: 10

1k requests in 10.02s, 252 kB read
You will observe that the performance of the route is practically the same as
with the /fibonacci-recursive/:n route. However, since the event loop is no
longer being blocked, the server responsiveness should increase tremendously.
You can see this in action by repeating the following test from earlier in the tutorial:
curl http://localhost:3000/fibonacci-worker-thread/50
Then, simulate traffic to the server root while the 50th Fibonacci number is being calculated in a worker thread:
autocannon --renderStatusCodes http://localhost:3000/
. . .
┌──────┬────────┐
│ Code │ Count  │
├──────┼────────┤
│ 200  │ 435375 │
└──────┴────────┘

Req/Bytes counts sampled once per second.
# of samples: 11

435k requests in 11.01s, 84 MB read
On my test machine, the server was able to process about 435k additional requests in 10 seconds while the CPU-bound calculation was running! This is a dramatic improvement over the previous result, where no additional requests could be processed due to the event loop being blocked.
Using a Worker Pool in Your Node.js Production App
There is a lack of a performance boost in the /fibonacci-worker-thread/:n route
because a new worker is created for every request. This constant creation and
destruction of worker threads for short-lived tasks increases execution latency
and negates the performance boost that should come with utilizing workers.
In a production setting, it's advisable to set up a worker pool containing several workers designated for executing tasks. Incoming tasks are added to a queue and assigned to an available worker that subsequently handles the task in a separate thread. After finishing a task, the worker then takes on a new one from the queue, ensuring efficient and continuous processing.
Setting Up The Workerpool Package
The easiest way to implement a worker pool is by using the
workerpool package (already installed in the demo project). Open the
src/worker-pool.js file:
// src/worker-pool.js
import workerpool from "workerpool";
import { calcFiboRecursive, calcFiboMatrix } from "./fibonacci.js";

workerpool.worker({
  calcFiboRecursive,
  calcFiboMatrix,
});
The worker() method creates a new worker and registers the
calcFiboRecursive() function as a public method. You can observe how the
worker is used in your application by locating the /fibonacci-worker-pool/:n
route in your server.js file:
// src/server.js
import workerpool from 'workerpool';

. . .

const pool = workerpool.pool(path.join(__dirname, 'worker-pool.js'));

. . .

fastify.get('/fibonacci-worker-pool/:n', async (request, reply) => {
  const n = parseInt(request.params.n, 10);

  const result = await pool.exec('calcFiboRecursive', [n]);

  reply.send({ result });
});
The pool() method creates a worker pool and the exec() method executes a
registered function accordingly. This method returns a promise so you can
receive messages from the worker using async/await as demonstrated above.
Load Testing the Route
You can now load test the route to observe the impact on performance:
autocannon --renderStatusCodes http://localhost:3000/fibonacci-worker-pool/30
You should see a significant improvement in throughput:
. . .
┌──────┬───────┐
│ Code │ Count │
├──────┼───────┤
│ 200  │ 7459  │
└──────┴───────┘

Req/Bytes counts sampled once per second.
# of samples: 10

7k requests in 10.01s, 1.4 MB read
We've made performance 4x faster when calculating the 30th Fibonacci number using a fixed worker pool (set by default to the number of available CPUs minus one) instead of a worker thread per request.
2. Using a More Efficient Algorithm
We've managed to improve the performance of the Fibonacci computation and the server's overall responsiveness through worker pools. But with higher numbers, the recursive Fibonacci algorithm is still prohibitively expensive.
When performing CPU-intensive computations, it's necessary to investigate more efficient algorithms and data structures, as these can often yield a much more significant improvement than throwing more CPU power at the problem.
In this example, we'll adopt the Matrix exponentiation algorithm for calculating Fibonacci numbers as shown below:
// src/fibonacci.js
function multiplyMatrix(matrix1, matrix2) {
  const a = matrix1[0][0];
  const b = matrix1[0][1];
  const c = matrix1[1][0];
  const d = matrix1[1][1];
  const e = matrix2[0][0];
  const f = matrix2[0][1];
  const g = matrix2[1][0];
  const h = matrix2[1][1];
  const result = [
    [a * e + b * g, a * f + b * h],
    [c * e + d * g, c * f + d * h],
  ];
  return result;
}

function power(matrix, n) {
  if (n === 1) {
    return matrix;
  }
  if (n % 2 === 0) {
    const halfPower = power(matrix, n / 2);
    return multiplyMatrix(halfPower, halfPower);
  } else {
    const halfPower = power(matrix, Math.floor(n / 2));
    const multiplied = multiplyMatrix(halfPower, halfPower);
    return multiplyMatrix(matrix, multiplied);
  }
}

function calcFiboMatrix(n) {
  if (n === 0) {
    return 0;
  }
  const baseMatrix = [
    [1, 1],
    [1, 0],
  ];
  const resultMatrix = power(baseMatrix, n - 1);
  return resultMatrix[0][0];
}
Here, the calcFiboMatrix() function calculates the nth Fibonacci number by
leveraging matrix exponentiation techniques. It represents Fibonacci numbers as
elements of a matrix and efficiently computes the desired number using matrix
multiplication and exponentiation, yielding a much faster result for large
Fibonacci numbers compared to the recursive approach.
To see the impact of this algorithm on performance, send traffic to the
/fibonacci-matrix/:n route as follows:
autocannon --renderStatusCodes http://localhost:3000/fibonacci-matrix/30
. . .
┌──────┬────────┐
│ Code │ Count  │
├──────┼────────┤
│ 200  │ 478176 │
└──────┴────────┘

Req/Bytes counts sampled once per second.
# of samples: 11

478k requests in 11.01s, 89.9 MB read
Improvements in Performance
Performance improves drastically to 47.8k requests per second, nearing the throughput of the root route that does basically no work. Even when finding the 1000th Fibonacci number, the numbers drop only slightly to about 41.4k RPS.
Naturally, you might expect even greater performance if the faster algorithm is executed in a worker pool. However, it actually yields a slower comparative performance due to the overhead of creating workers and message passing:
autocannon --renderStatusCodes http://localhost:3000/fibonacci-worker-matrix/30
. . .
┌──────┬────────┐
│ Code │ Count  │
├──────┼────────┤
│ 200  │ 310678 │
└──────┴────────┘

Req/Bytes counts sampled once per second.
# of samples: 11

311k requests in 11.01s, 58.4 MB read
This result demonstrates the importance of benchmarking your solutions properly when testing performance fixes to ensure that your optimizations don't end up yielding worse performance.
Monitoring Node.js Performance in Production with AppSignal
Identifying and resolving performance issues in your Node.js applications is sure to be an ongoing process. To ensure a good experience for your users, establish a robust monitoring system to quickly detect and help you address issues before they impact your customers.
AppSignal makes proactive performance monitoring for Node.js applications simple and convenient, and you can start monitoring in only a couple of steps.
Simply sign up for a free account (you can do a 30-day free trial, no credit card required), create a new application, then copy the Push API Key under Push & Deploy in the App settings page.
In the demo project, @appsignal/nodejs is already installed, but you may install it in your own projects like this:
npm install @appsignal/nodejs
Afterwards, create a .env file in the project root and enter the following,
replacing the placeholder with the Push API Key you copied:
APPSIGNAL_PUSH_API_KEY=<your_appsignal_push_api_key>
The next step is to uncomment the appsignal.js import in the src/server.js
file, which sets up the (minimal) configuration you need to get started:
// src/server.js
import "./appsignal.js";
// src/appsignal.js
import { Appsignal } from "@appsignal/nodejs";

new Appsignal({
  active: true,
  name: "Node.js App",
  pushApiKey: process.env.APPSIGNAL_PUSH_API_KEY,
});
AppSignal automatically integrates with Fastify, Express, and several other libraries and frameworks. You don't need to do any further setup to start collecting performance metrics, errors, and other relevant monitoring data.
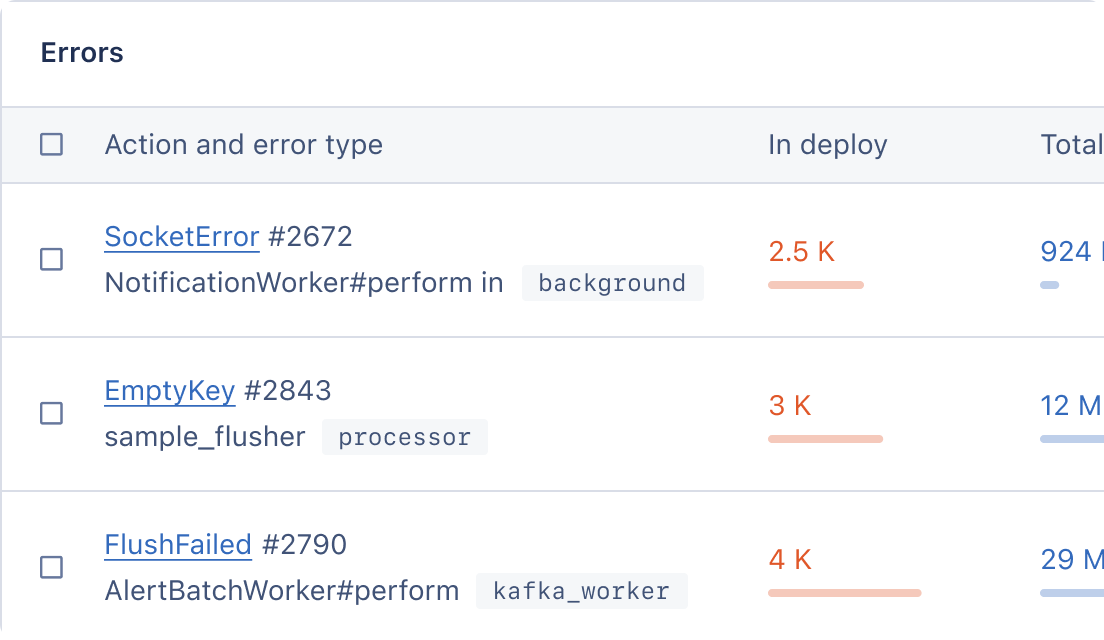
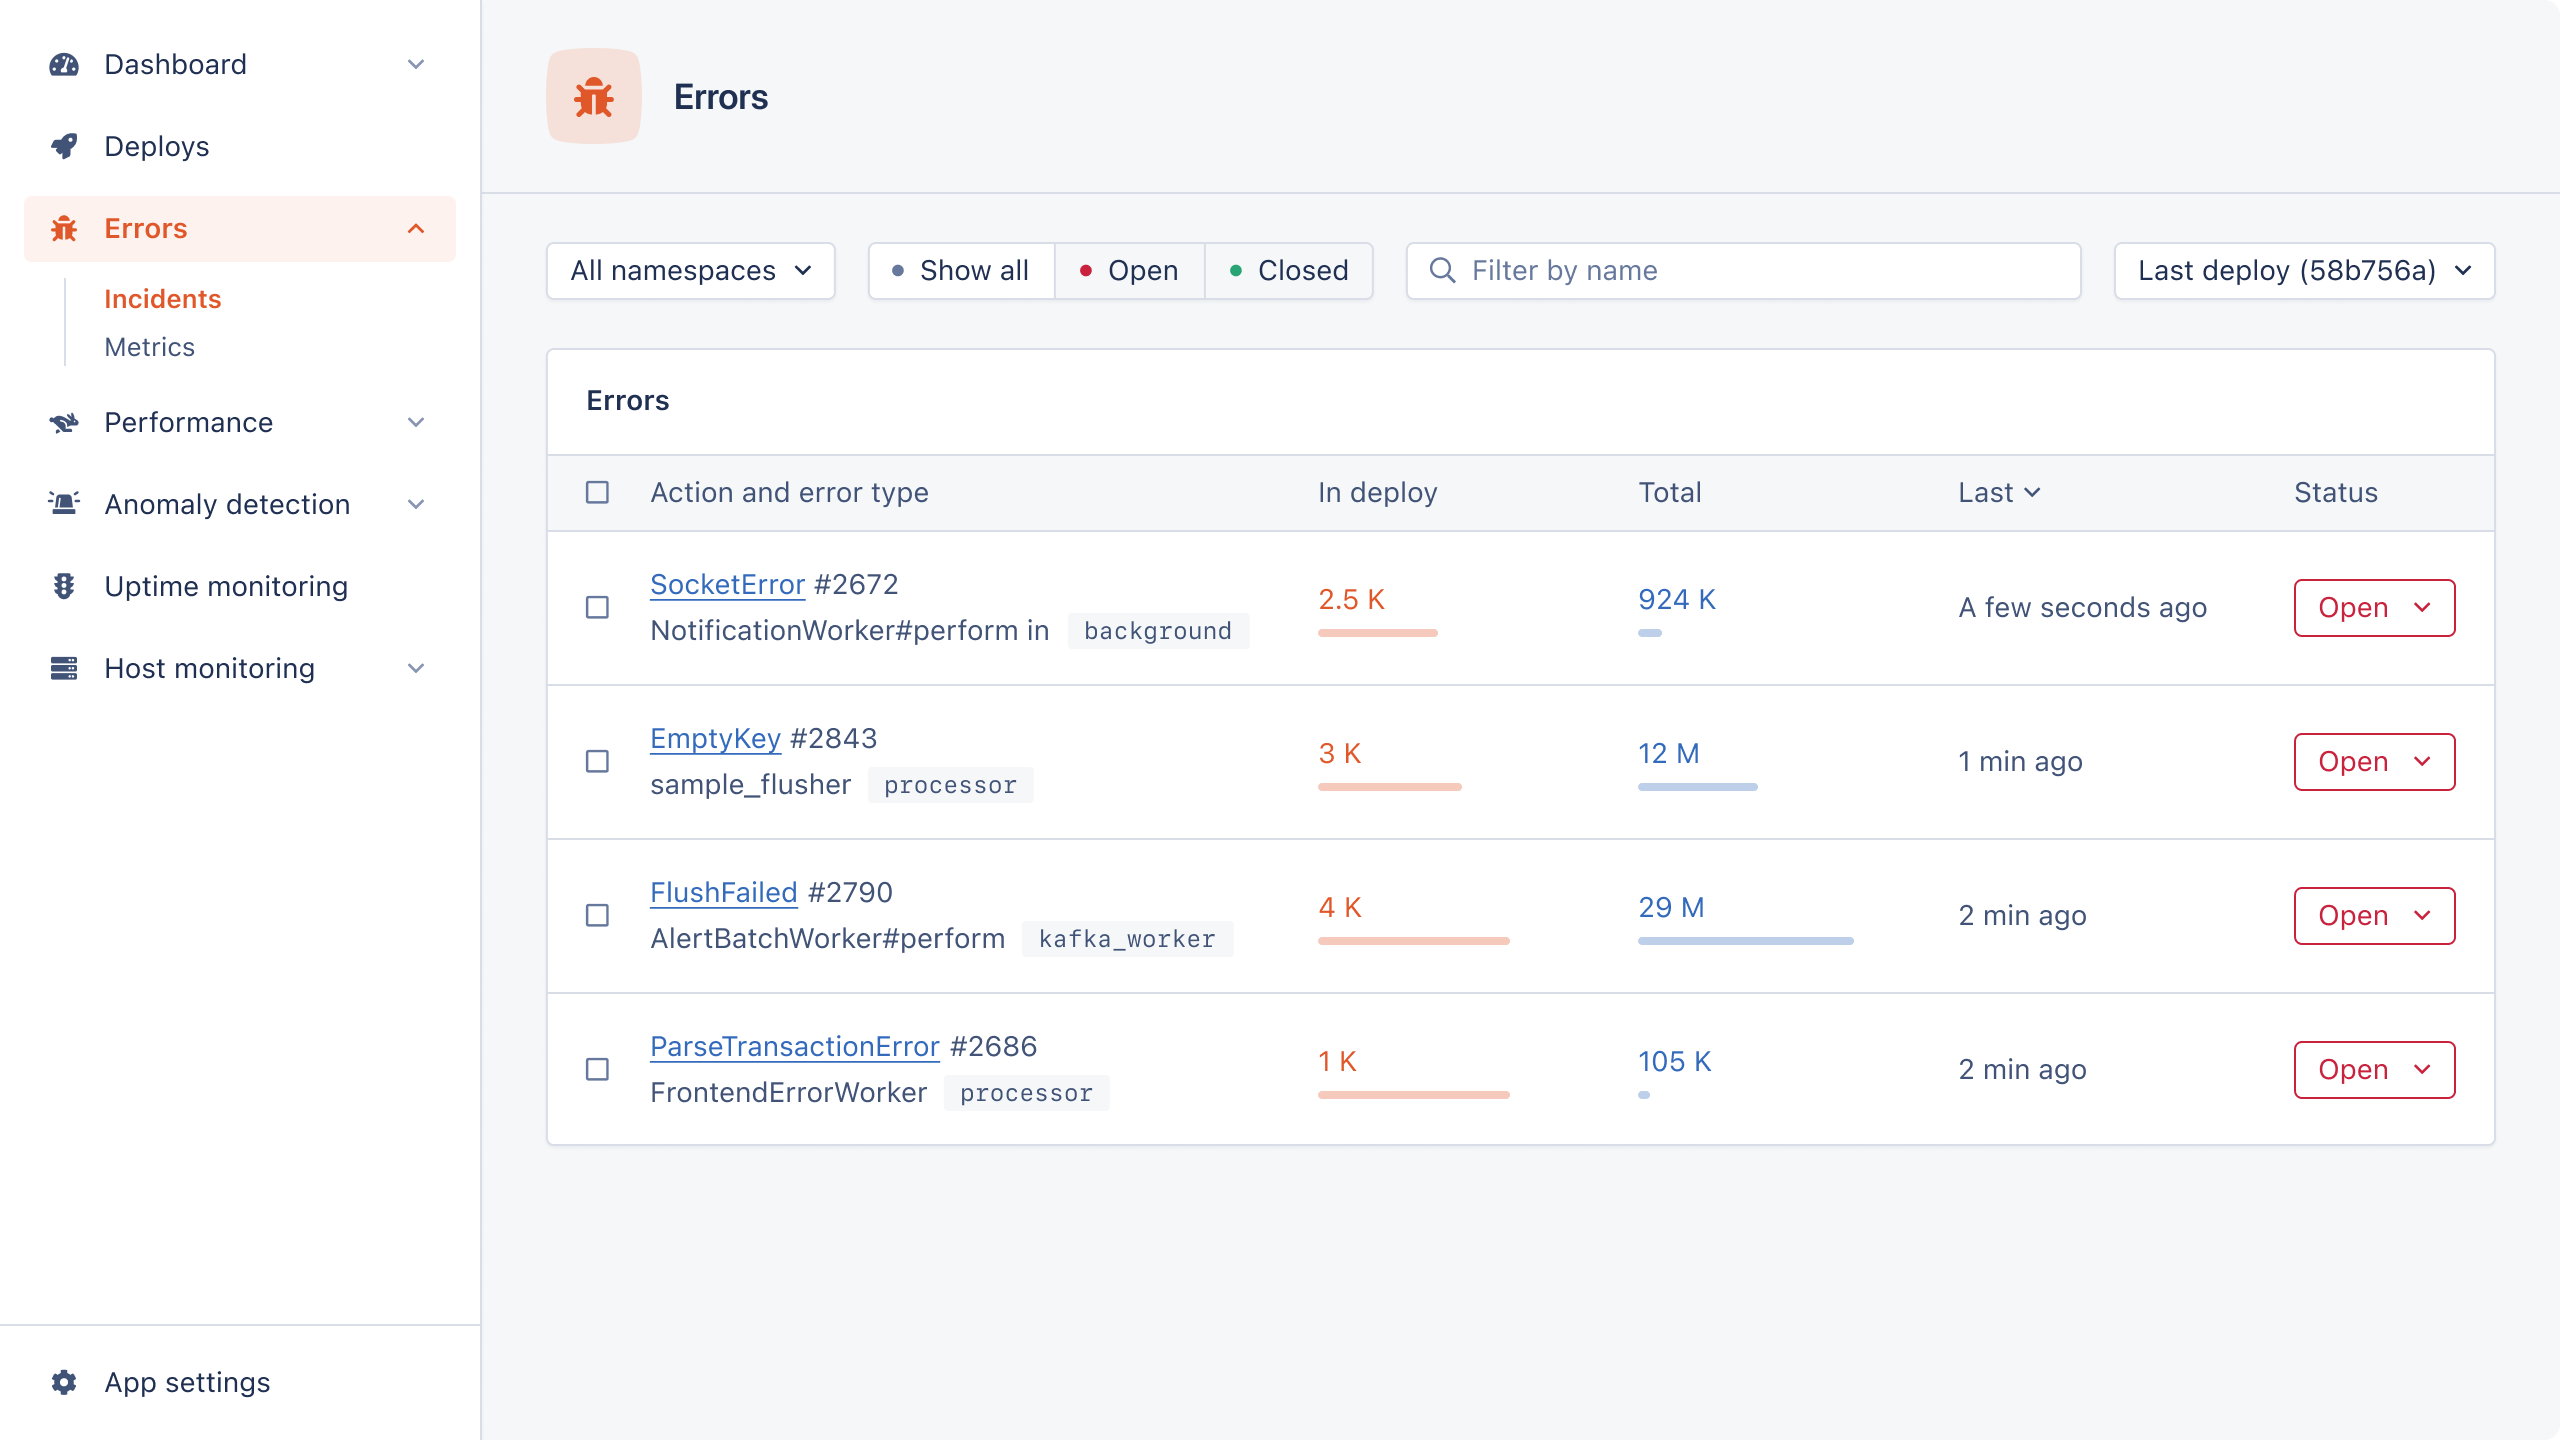
Once you restart your application and start sending traffic to the server, you should see the metrics in your Performance dashboard.
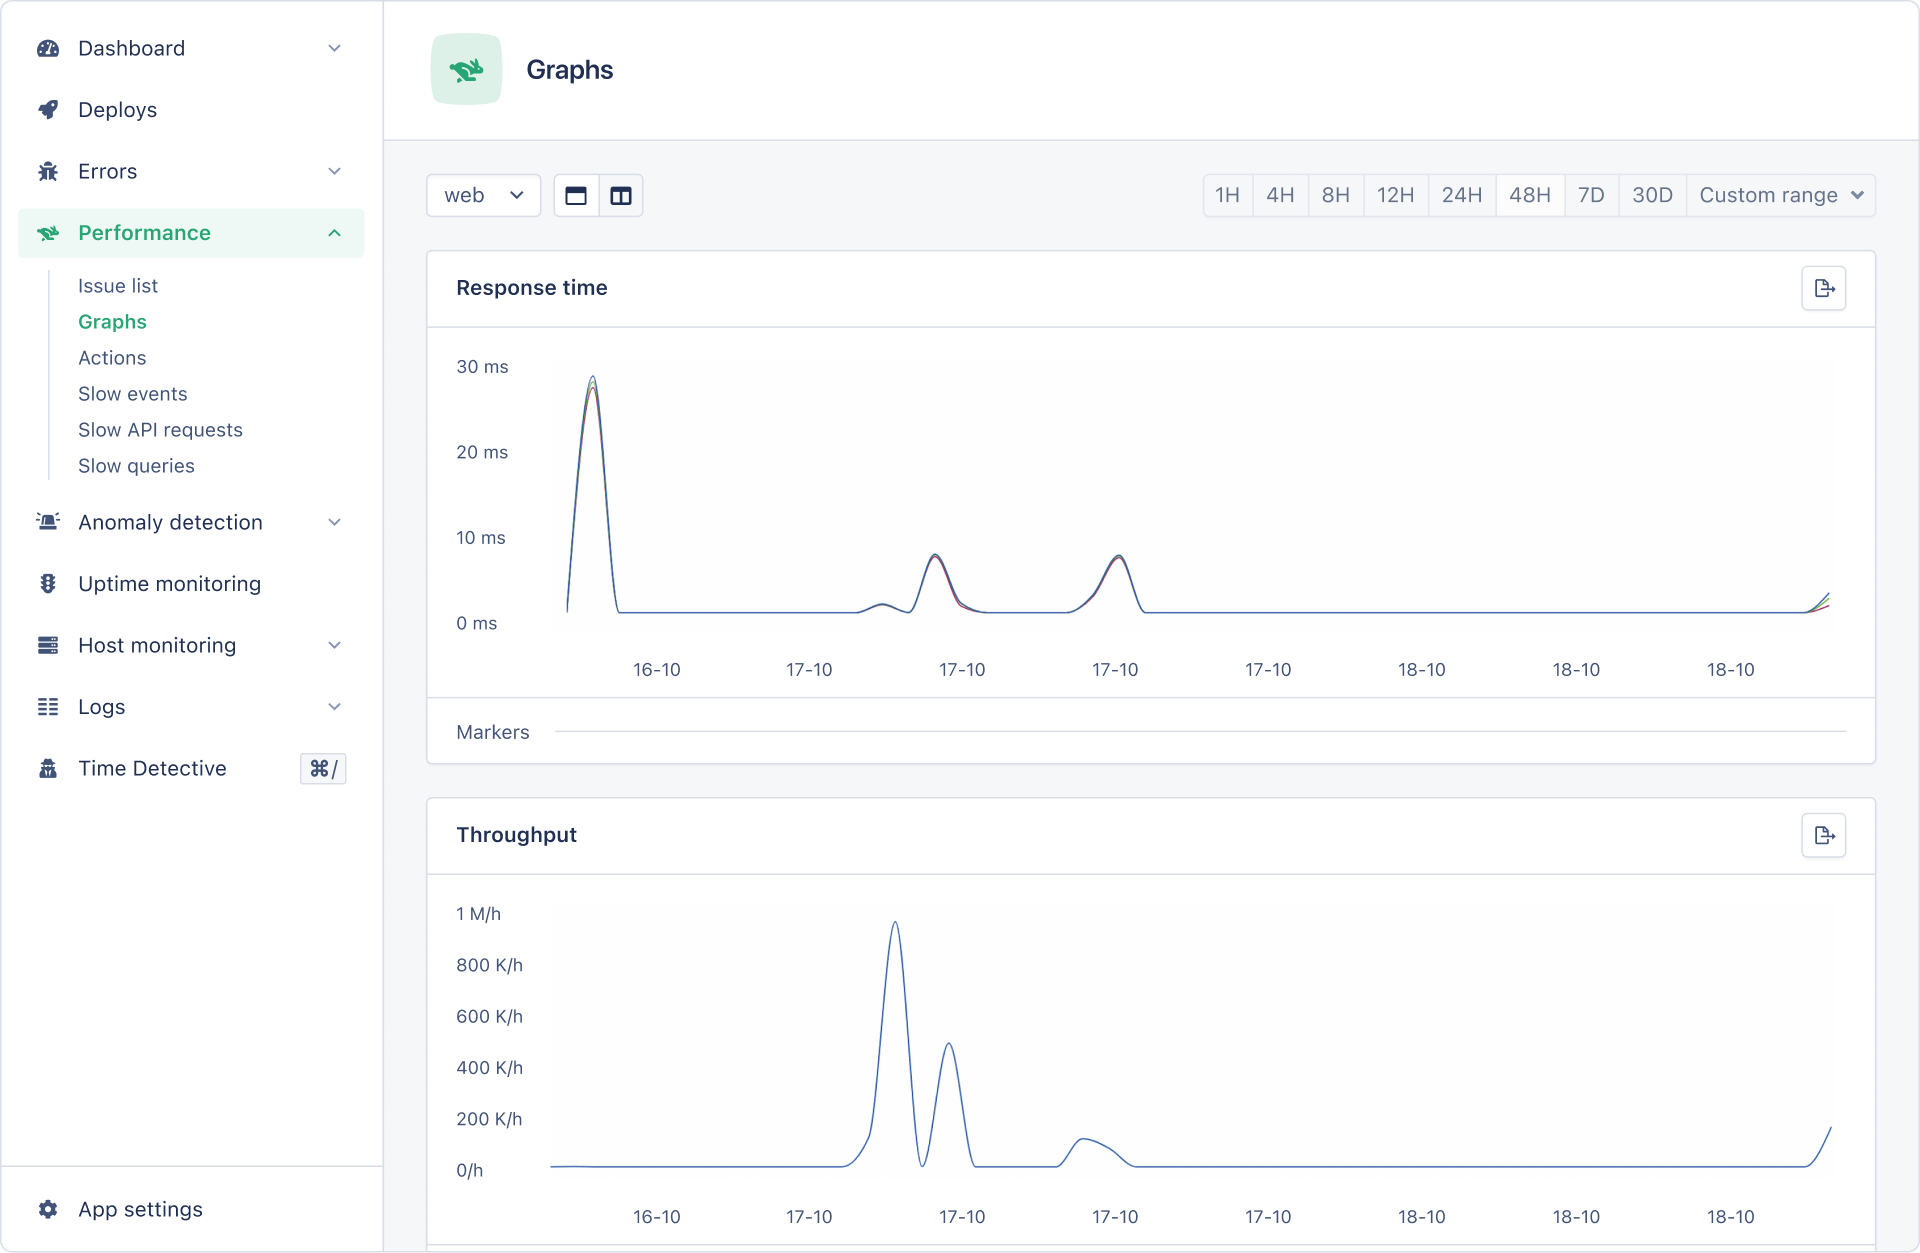
From here, you can monitor the performance of your application in real-time. You can even configure alerts so that you are quickly notified if something goes wrong, e.g., the throughput of your service drops below a configured threshold:
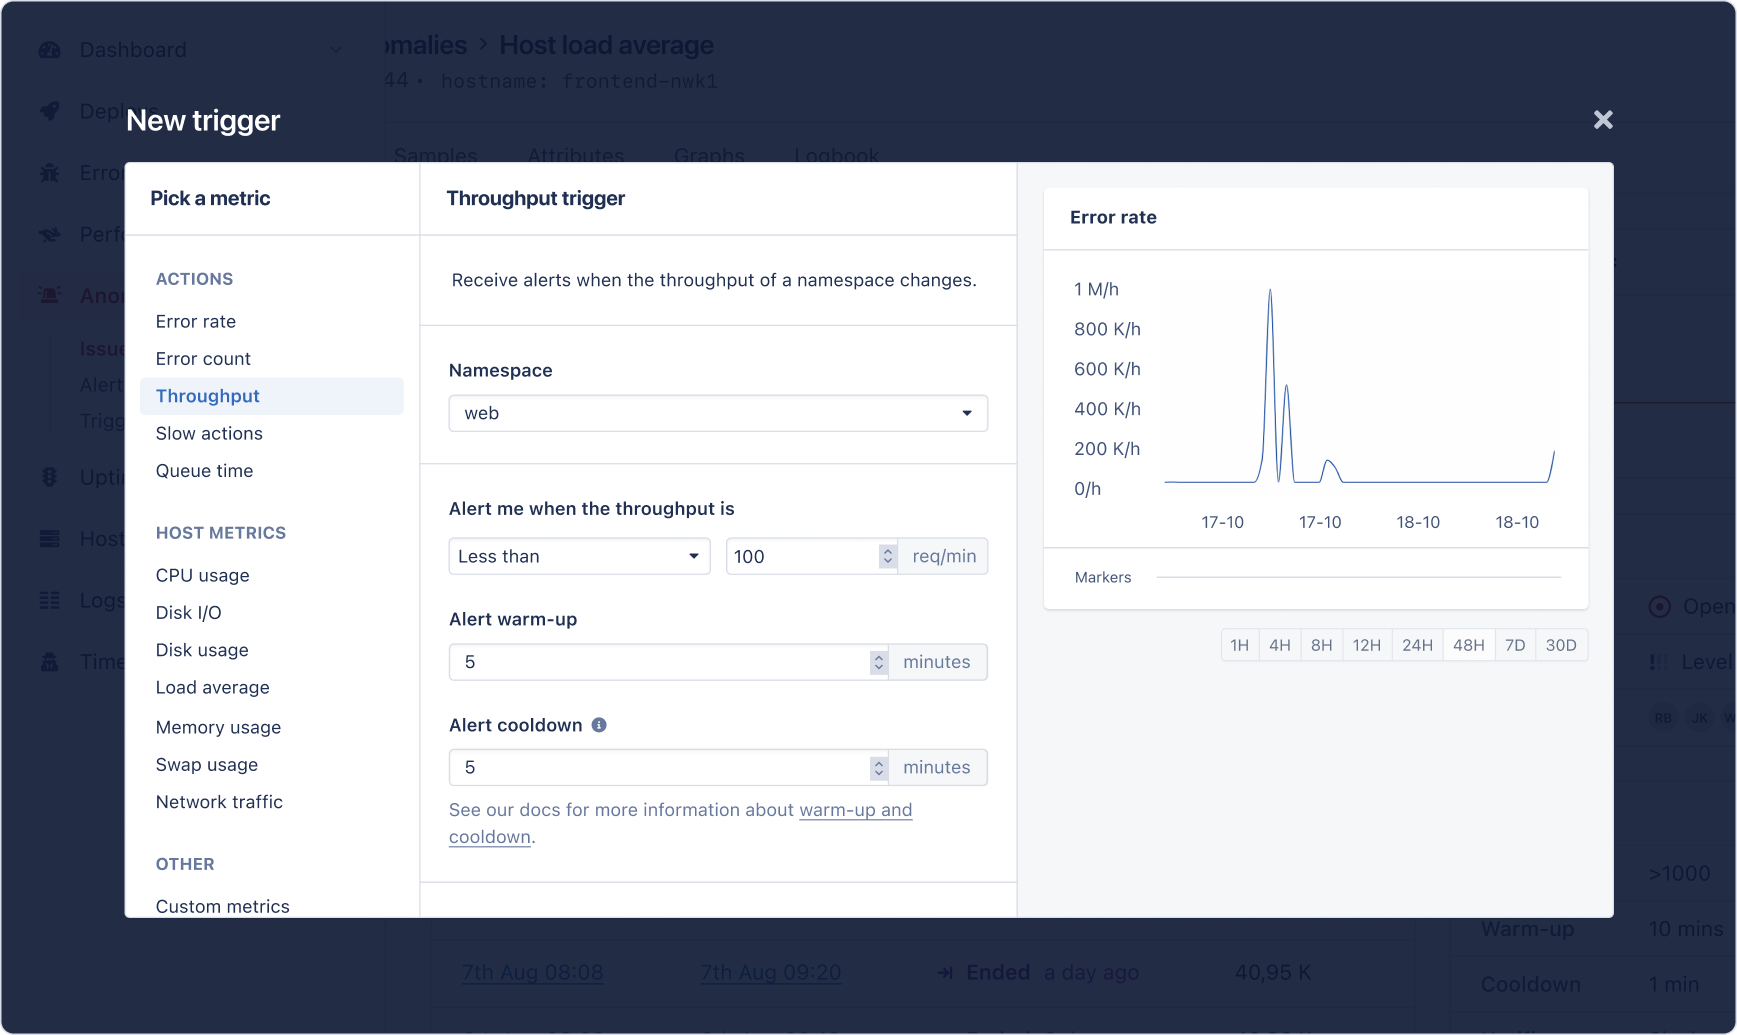
And that's it!
Further Reading
To further enhance your knowledge of CPU performance in Node.js, explore the Worker threads and Inspector documentation.
Additionally, consider diving into the Chrome DevTools docs to gain deeper insights into interpreting profiling data.
For additional insights, our article on improving Node.js performance at scale may also prove useful.
Wrapping Up
In this article, we covered two of the most effective techniques for faster and more responsive Node.js applications when dealing with CPU-intensive tasks:
- Using worker threads
- Using a more efficient algorithm
By implementing either technique, you can significantly reduce the performance impact of CPU-bound tasks, ensuring a smoother user experience.
We also emphasized the importance of staying vigilant by continuously monitoring your application's performance in a real-world environment. In this way, you can detect new bottlenecks and refine your strategies accordingly.
Happy profiling and optimizing!
P.S. If you liked this post, subscribe to our JavaScript Sorcery list for a monthly deep dive into more magical JavaScript tips and tricks.
P.P.S. If you need an APM for your Node.js app, go and check out the AppSignal APM for Node.js.