
This post is part of Develop Single-Machine Rails Applications with LiteStack Series
- 1An Introduction to LiteStack for Ruby on Rails
- 2A Deep Dive Into LiteDB for Ruby on Rails
- 3Handle Incoming Webhooks with LiteJob for Ruby on Rails
- 4Stream Updates to Your Users with LiteCable for Ruby on Rails
- 5Speed Up Your Ruby on Rails Application with LiteCache
- 6Full-Text Search for Ruby on Rails with Litesearch
In this series of posts, we will look at LiteStack, a one-stop-shop solution that hosts and processes all your production data on a single machine. LiteStack (as the name suggests) makes use of SQLite to provide:
- a database using the LiteDB adapter
- an ActiveJob backend (LiteJob)
- an ActionCable backend (LiteCable)
- an ActiveSupport::Cache store (LiteCache)
In this first post, we'll introduce the basics of LiteStack and set up an example Rails application.
Let's begin!
An Introduction to SQLite
SQLite itself has been the go-to embedded database of many industries for decades. For example, it's widely used in native app development, testing environments, caching, and others.
Recently, though, it has attracted a lot of experimentation and extensions. One of the most popular extensions is Litestream, which can recover stream changes to an S3-compatible bucket. This means you get a replica of your production database at a very cheap price point and can recover from failure anytime.
Incidentally, this has made using SQLite as a production database for your Rails app a feasible option. Combined with a full-fledged development stack like LiteStack, it promises to make apps hosted on a single machine a reality. We are here to test this hypothesis and point out any obstacles in the way.
To do this, we need an example app that's complex enough to surface potential difficulties, but simple enough to fit this series.
Our Example Rails Application
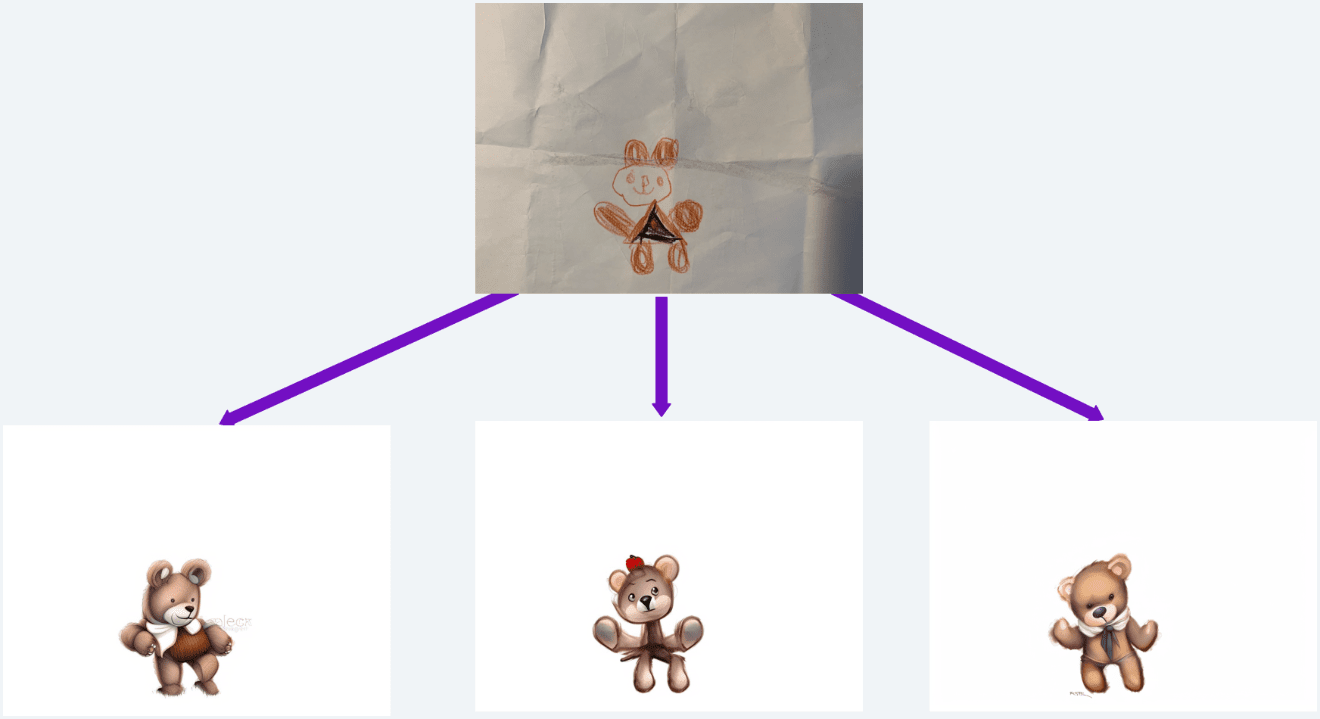
We will write an app that transforms children's drawings using StableDiffusion on replicate.com.
As an example, here's a cute teddy bear drawn by my daughter, with a couple of StableDiffusion interpretations:
As a rough sketch, our app will cover the following steps:
- The user uploads an image with a textual prompt (we'll show some advanced SQLite techniques here).
- The user chooses an image style (e.g., "cartoon", "oil painting", "photorealistic", "3D rendering").
- The processing happens in the background (this kicks off a LiteJob-powered job).
- While the processing is underway, we show a placeholder image and update the logs sent over by the server. Once completed, we update it to show the actual image. This allows us to explore LiteCable as we replace the image via Turbo Streams.
- We store the image prediction.
- We use LiteCache to wrap computationally costly views.
These steps provide a scaffold for this series. The remainder of this post, though, will be concerned with setting up the app.
We start by creating a new Rails app called skAItch, using esbuild as our JavaScript bundler and SASS as the CSS preprocessor:
$ rails new -d sqlite3 --skip-action-mailbox -j esbuild -c sass skaitch
$ cd skaitch
$ bin/rails g action_text:install
$ bin/rails db:migrate
Install LiteStack
Next, we install LiteStack using the shipped generator:
$ bundle add litestack
$ bin/rails g litestack:install
After that is done, we complete the setup and start the development server:
$ bin/setup
$ bin/dev
Authentication and Tenants
Subsequently, we need a way to authenticate our users to associate prompts with them. Rather than using an incumbent like Devise, I chose to use a different approach. The authentication-zero gem can flexibly generate an authentication system, as opposed to including it as an engine. Conveniently, it comes with options such as:
- authentication by token (for APIs)
- two-factor auth
- multitenancy
- rate limiting
- an OmniAuth interface
- passwordless auth
I've chosen to add the --tenantable option because it's always a good idea to automatically scope your database records to accounts. Authentication-zero provides this with the AccountScoped model concern.
$ bundle add authentication-zero --group development
$ bin/rails g authentication --tenantable
$ bin/rails db:migrate
Let's add a first user via database seeds:
# db/seeds.rb
User.create(
  email: "julian@example.com",
  password: "mypassword123",
  password_confirmation: "mypassword123",
  verified: true
)
Prompt Scaffold
Now it's time to start writing our actual application logic. We start by defining the central model of our app: the Prompt.
We want our prompt to have a title, a description, and a reference to the account that created it. Furthermore, to test SQLite's "file system" capabilities, we would like it to store the prompt image in binary form:
$ bin/rails g scaffold Prompt title:string description:rich_text prompt_image:binary account:references
$ bin/rails db:migrate
A prompts resources entry is also added to config/routes.rb. Note that authentication-zero adds a before_action authenticating the user to ApplicationController by default.
  # config/routes.rb
    Rails.application.routes.draw do
+     resources :prompts

      get  "sign_in", to: "sessions#new"
      post "sign_in", to: "sessions#create"
      get  "sign_up", to: "registrations#new"
      post "sign_up", to: "registrations#create"
      resources :sessions, only: [:index, :show, :destroy]
      resource  :password, only: [:edit, :update]
      namespace :identity do
        resource :email,              only: [:edit, :update]
        resource :email_verification, only: [:show, :create]
        resource :password_reset,     only: [:new, :edit, :create, :update]
      end
      root "home#index"
    end
Furthermore, we include the AccountScoped concern in our Prompt model, which allows us to scope the stored records by logged-in account. We also validate that a prompt title and image are present.
  # app/models/prompt.rb
  class Prompt < ApplicationRecord
+   include AccountScoped

    belongs_to :account
    has_rich_text :description

+   validates :title, :prompt_image, presence: true
  end
As the final step to enable multitenancy, we have to connect the prompt to an account when it is created. We do this in the PromptsController:
  # app/controllers/prompts_controller.rb
  class PromptsController < ApplicationController

    # other actions omitted

    def create
      @prompt = Prompt.new(prompt_params)
+     @prompt.account = Current.account

      respond_to do |format|
        if @prompt.save
          format.html { redirect_to prompt_url(@prompt), notice: "Prompt was successfully created." }
          format.json { render :show, status: :created, location: @prompt }
        else
          format.html { render :new, status: :unprocessable_entity }
          format.json { render json: @prompt.errors, status: :unprocessable_entity }
        end
      end
    end

    # ...
  end
Connecting our Rails Application to Replicate.com
Replicate.com is a leading platform for running AI predictions on high-performance graphics cards. It features an API to create predictions, train and store models, etc. To use it, you have to obtain an API token from https://replicate.com/account/api-tokens.
Note: Running predictions on Replicate is subject to a charge.
Fortunately for us, there are official and unofficial clients that interface with the API. One such wrapper is the replicate-rails gem, which we will install now:
  # Gemfile

  # ... other gems

+ gem 'replicate-rails', require: 'replicate_rails'
$ bundle install
To store our API key securely, we are going to use Rails credentials:
$ EDITOR=vim bin/rails credentials:edit
  # config/credentials.yml.enc
  secret_key_base: YOUR_SECRET_KEY_BASE

+ replicate:
+   api_token: YOUR_REPLICATE_API_TOKEN
Editing and saving this file will encrypt your credentials, and it can only be opened by providing the correct RAILS_MASTER_KEY.
Now, we have to put it to use. As suggested in replicate-rails' README, we authenticate against Replicate in an initializer. We also define a webhook handler which (in our case) is just a class put into the same file. Note that I added a binding.irb breakpoint here for a first test of our functionality.
# config/initializers/replicate.rb
Replicate.client.api_token = Rails.application.credentials[:replicate][:api_token]

class ReplicateWebhook
  def call(prediction)
    binding.irb
  end
end

ReplicateRails.configure do |config|
  config.webhook_adapter = ReplicateWebhook.new
end
Replicate-rails also ships a default webhook controller, which calls the above handler. We only have to mount it in our config/routes.rb:
  # config/routes.rb
  Rails.application.routes.draw do
+   mount ReplicateRails::Engine => "/replicate/webhook"

    resources :prompts

    # ... more routes omitted
  end
To test the webhook locally, you have to set up a tunnel, for example, with Ngrok. The steps to set it up are beyond the scope of this article, but it's pretty simple. Please refer to the Ngrok docs.
You do, however, have to tell Rails that it may listen to your tunnel's URL. To enable this, add it to the allowed_hosts in config/application.rb:
  # ...requires omitted

  # config/application.rb
  module Skaitch
    class Application < Rails::Application
      # Initialize configuration defaults for originally generated Rails version.
      config.load_defaults 7.0

      # Configuration for the application, engines, and railties goes here.
      #
      # These settings can be overridden in specific environments using the files
      # in config/environments, which are processed later.
      #
      # config.time_zone = "Central Time (US & Canada)"
      # config.eager_load_paths << Rails.root.join("extras")
+     config.hosts << "YOUR_NGROK_URL"
    end
  end
Running a Prediction
Now we'll test creating a prediction. The only missing bit is to hook it up in our PromptsController. The general workflow is as follows:
- We retrieve a model (in our case, the
stable-diffusion-img2imgmodel) from Replicate. - We grab a specific version (in our case, the latest one) to run the prediction against.
- We run the prediction, specifying:
- A text prompt describing the image (in our case, our prompt's title).
- An image prompt that we have to provide as a Base64-encoded Data URL.
- A webhook to ping when the prediction completes (we point it at the webhook route provided by replicate-rails).
# app/controllers/prompts_controller.rb
  class PromptsController < ApplicationController

    # other actions omitted

    def create
      @prompt = Prompt.new(prompt_params)
      @prompt.account = Current.account

+     model = Replicate.client.retrieve_model("stability-ai/stable-diffusion-img2img")
+     version = model.latest_version
+     version.predict({prompt: prompt_params[:title], image: prompt_image_data_url}, replicate_rails_url)

      # respond_to omitted
    end

    # ...

    private

    # other private methods omitted

+   def prompt_image_data_url
+     encoded_data = Base64.strict_encode64(prompt_image.read)
+
+     "data:image/#{prompt_image.content_type};base64,#{encoded_data}"
+   end
+
+   def prompt_image
+     @prompt_image ||= prompt_params[:prompt_image]
+   end
  end
If you go to https://YOUR_NGROK_URL/prompts/new and upload an image together with a title, you will now trigger a prediction. When done, it will call back via the provided webhook. Because we set a binding.irb breakpoint there, the controller action stops in a REPL, and we can take a look around:
> prediction.succeeded?
=> true
> prediction.output
=> ["https://replicate.delivery/SOME_SIGNED_PATH/out-0.png"]
As we can see, our first run of an image-to-image generation succeeded. The prediction model returns a URL to the created image, which we will want to store locally (they are deleted at Replicate periodically). We will take a closer look at this next time.
Up Next: LiteDB Deep Dive
In this opening post, we introduced the LiteStack environment as an interesting alternative to host all of your Rails app's components on a single machine. We have furthermore set up an example app that talks to Replicate.com for AI image generation.
In the next part of this series, we will explore the first and central element of LiteStack — LiteDB — in more depth. We will look at some traits that make it uniquely powerful, common pitfalls, limitations, and tradeoffs.
Until then, happy coding!
P.S. If you'd like to read Ruby Magic posts as soon as they get off the press, subscribe to our Ruby Magic newsletter and never miss a single post!
This post is part of Develop Single-Machine Rails Applications with LiteStack Series
- 1An Introduction to LiteStack for Ruby on Rails
- 2A Deep Dive Into LiteDB for Ruby on Rails
- 3Handle Incoming Webhooks with LiteJob for Ruby on Rails
- 4Stream Updates to Your Users with LiteCable for Ruby on Rails
- 5Speed Up Your Ruby on Rails Application with LiteCache
- 6Full-Text Search for Ruby on Rails with Litesearch