
In this tutorial, we will build a simple Flask app that is primed and ready to deploy to Heroku.
Once the bare bones of the app are built, we will guide you through the setup process on GitHub and Heroku so that you can start making automatic deploys in no time.
But before we dive straight into the code, why choose Flask and Heroku in the first place?
Why Flask for Python?
Flask is a super-minimalistic web framework for Python. It provides only the absolute core functionality needed to build web applications in a small and nimble package.
One major advantage of this approach is that Flask provides web developers with maximum flexibility to design and build their app from the very beginning.
On the other hand, frameworks such as Django prefer the "batteries-included" philosophy. This means more is taken care of for you out-of-the-box, but there will be more boilerplate code. The structure of your application is more rigid and harder to change later on.
Also, as the industry moves away from big code "monoliths" built on frameworks like Django, and towards smaller microservice architecture, it has never been a better time to get familiar with Flask.
Why Heroku?
When Heroku launched in 2007, it was one of the first cloud platforms renowned for its user-friendly interface and ease of use. Using Heroku was a huge time-saver, as it made deploying web applications much easier than configuring all your infrastructure from scratch using AWS. In fact, Heroku itself is built on AWS infrastructure. Another advantage was the fact that you could deploy your hobby app with a full Postgres database totally for free.
Since then, several other cloud services have sprung up to challenge Heroku's first-mover advantage in the sector of cloud computing known as Platform-as-a-Service (PaaS).
But Heroku still retains one significant edge over the newer cloud providers: its extensive library of third-party add-ons.
If you need functionality for your app like error tracking or performance monitoring (which, incidentally, AppSignal provides) you can simply install an add-on for that on Heroku's interface and get started immediately. For many developers, this speed and convenience might make the difference between shipping or not shipping.
Create a Python Flask Demo App for Heroku Deployment
The very first thing we need to do is create an empty Flask project. Lets call it flask-heroku-appsignal. We'll also create the main entry point file for our project, app.py:
mkdir flask_heroku_appsignal
cd flask-heroku-appsignal
touch app.py
Then we'll make our project a git repository by running the git initialize command in the root of the directory:
git init
By the way, if you want to view the full code for this article at any point, download or clone it here.
Next, we need to install the core dependencies, which include Flask itself, python-dotenv (to manage environment variables), and gunicorn, which will act as the "bridge" between Heroku's web servers and our web application.
Create a requirements.txt file in the root of the project and just add the dependency names to it (you don't need to include the version numbers):
Flask
python-dotenv
gunicorn
Then run:
pip install -r requirements.txt
If everything goes smoothly, we should see some output that looks something like this:
Collecting Flask
  Using cached Flask-2.2.3-py3-none-any.whl (101 kB)
Collecting python-dotenv
  Using cached python_dotenv-1.0.0-py3-none-any.whl (19 kB)
Collecting Werkzeug>=2.2.2
  Using cached Werkzeug-2.2.3-py3-none-any.whl (233 kB)
Collecting itsdangerous>=2.0
  Using cached itsdangerous-2.1.2-py3-none-any.whl (15 kB)
Collecting click>=8.0
  Using cached click-8.1.3-py3-none-any.whl (96 kB)
Collecting Jinja2>=3.0
  Using cached Jinja2-3.1.2-py3-none-any.whl (133 kB)
Collecting MarkupSafe>=2.0
  Using cached MarkupSafe-2.1.2-cp310-cp310-macosx_10_9_x86_64.whl (13 kB)
Installing collected packages: python-dotenv, MarkupSafe, itsdangerous, click, Werkzeug, Jinja2, Flask
Successfully installed Flask-2.2.3 Jinja2-3.1.2 MarkupSafe-2.1.2 Werkzeug-2.2.3 click-8.1.3 itsdangerous-2.1.2 python-dotenv-1.0.0
Preparing for Heroku Deployment
Now that all our basic project foundations are in place, let’s start building and configuring our Flask app with deployment to Heroku in mind.
First, let's copy this super-simple "hello world" code into app.py to check everything is working as expected so far:
from flask import Flask
from dotenv import load_dotenv
load_dotenv()

app = Flask(__name__)

@app.route("/")
def index():
  return "Hello World!"
Then type flask run in the terminal. We should see the following output:
* Debug mode: off
WARNING: This is a development server. Do not use it in a production deployment. Use a production WSGI server instead.
 * Running on http://127.0.0.1:5000
Press CTRL+C to quit
When we go to localhost:5000, we will see the Hello World! string printed in the browser.
At this point, I have a nice time-saving Flask tip to share with you that isn't mentioned in most Flask tutorials.
By adding the simple one-liner below in your .env at the root of the project, you can save lots of time. You won't have to stop and start your local server every time you want to make changes to your backend code. While this doesn't sound like a huge thing, these small changes add up to loads of compounded saved time over the long run.
FLASK_DEBUG=True
As the “debug” name suggests, this setting will provide a nicely formatted error read-out in the browser to make it easier to debug your code.
Also, ensure that the .env file is included in your project's .gitignore so that it's not tracked by git. This means it will not be picked up by GitHub and Heroku (as we don’t want the debug mode to be part of our production settings).
After making this change, the output on our terminal will display Debug mode as on with the Debugger PIN:
* Debug mode: on
WARNING: This is a development server. Do not use it in a production deployment. Use a production WSGI server instead.
 * Running on http://127.0.0.1:5000
Press CTRL+C to quit
 * Restarting with stat
 * Debugger is active!
 * Debugger PIN: 133-697-373
Development and Production Settings In Our Python Flask App
Next, we want to make a clear distinction between the development and production settings in our Flask app. This is an important step in preparing for deployment to Heroku. To do this, we will create a config.py file in the root of the project and add the following code with three classes:
class Config:
 DEBUG = False
 DEVELOPMENT = False
 CSRF_ENABLED = True
 ASSETS_DEBUG = False

class ProductionConfig(Config):
 pass

class DevelopmentConfig(Config):
 DEBUG = True
 DEVELOPMENT = True
 TEMPLATES_AUTO_RELOAD = True
 ASSETS_DEBUG = True
Back in app.py, add the following two lines before the index route function:
...
env_config = os.getenv("PROD_APP_SETTINGS", "config.DevelopmentConfig")
app.config.from_object(env_config)
So now the full app.py will look like this:
import os
from flask import Flask
from dotenv import load_dotenv
load_dotenv()

app = Flask(__name__)

env_config = os.getenv("PROD_APP_SETTINGS", "config.DevelopmentConfig")
app.config.from_object(env_config)

@app.route("/")
def index():
	return "Hello World!"
Essentially, the code above says that if we find a key called PROD_APP_SETTINGS in our environment, the config for our app should be set to config.ProductionConfig. Otherwise, we can safely assume we are in development mode and set it to config.DevelopmentConfig.
Now we are ready to set up our app in Heroku's web interface.
GitHub Setup
Before setting up on Heroku, we first need to create a repository on GitHub.
Go to github.com and create a new account (if you don't have one already).
We can call our GitHub repository the same name as our local Flask project:
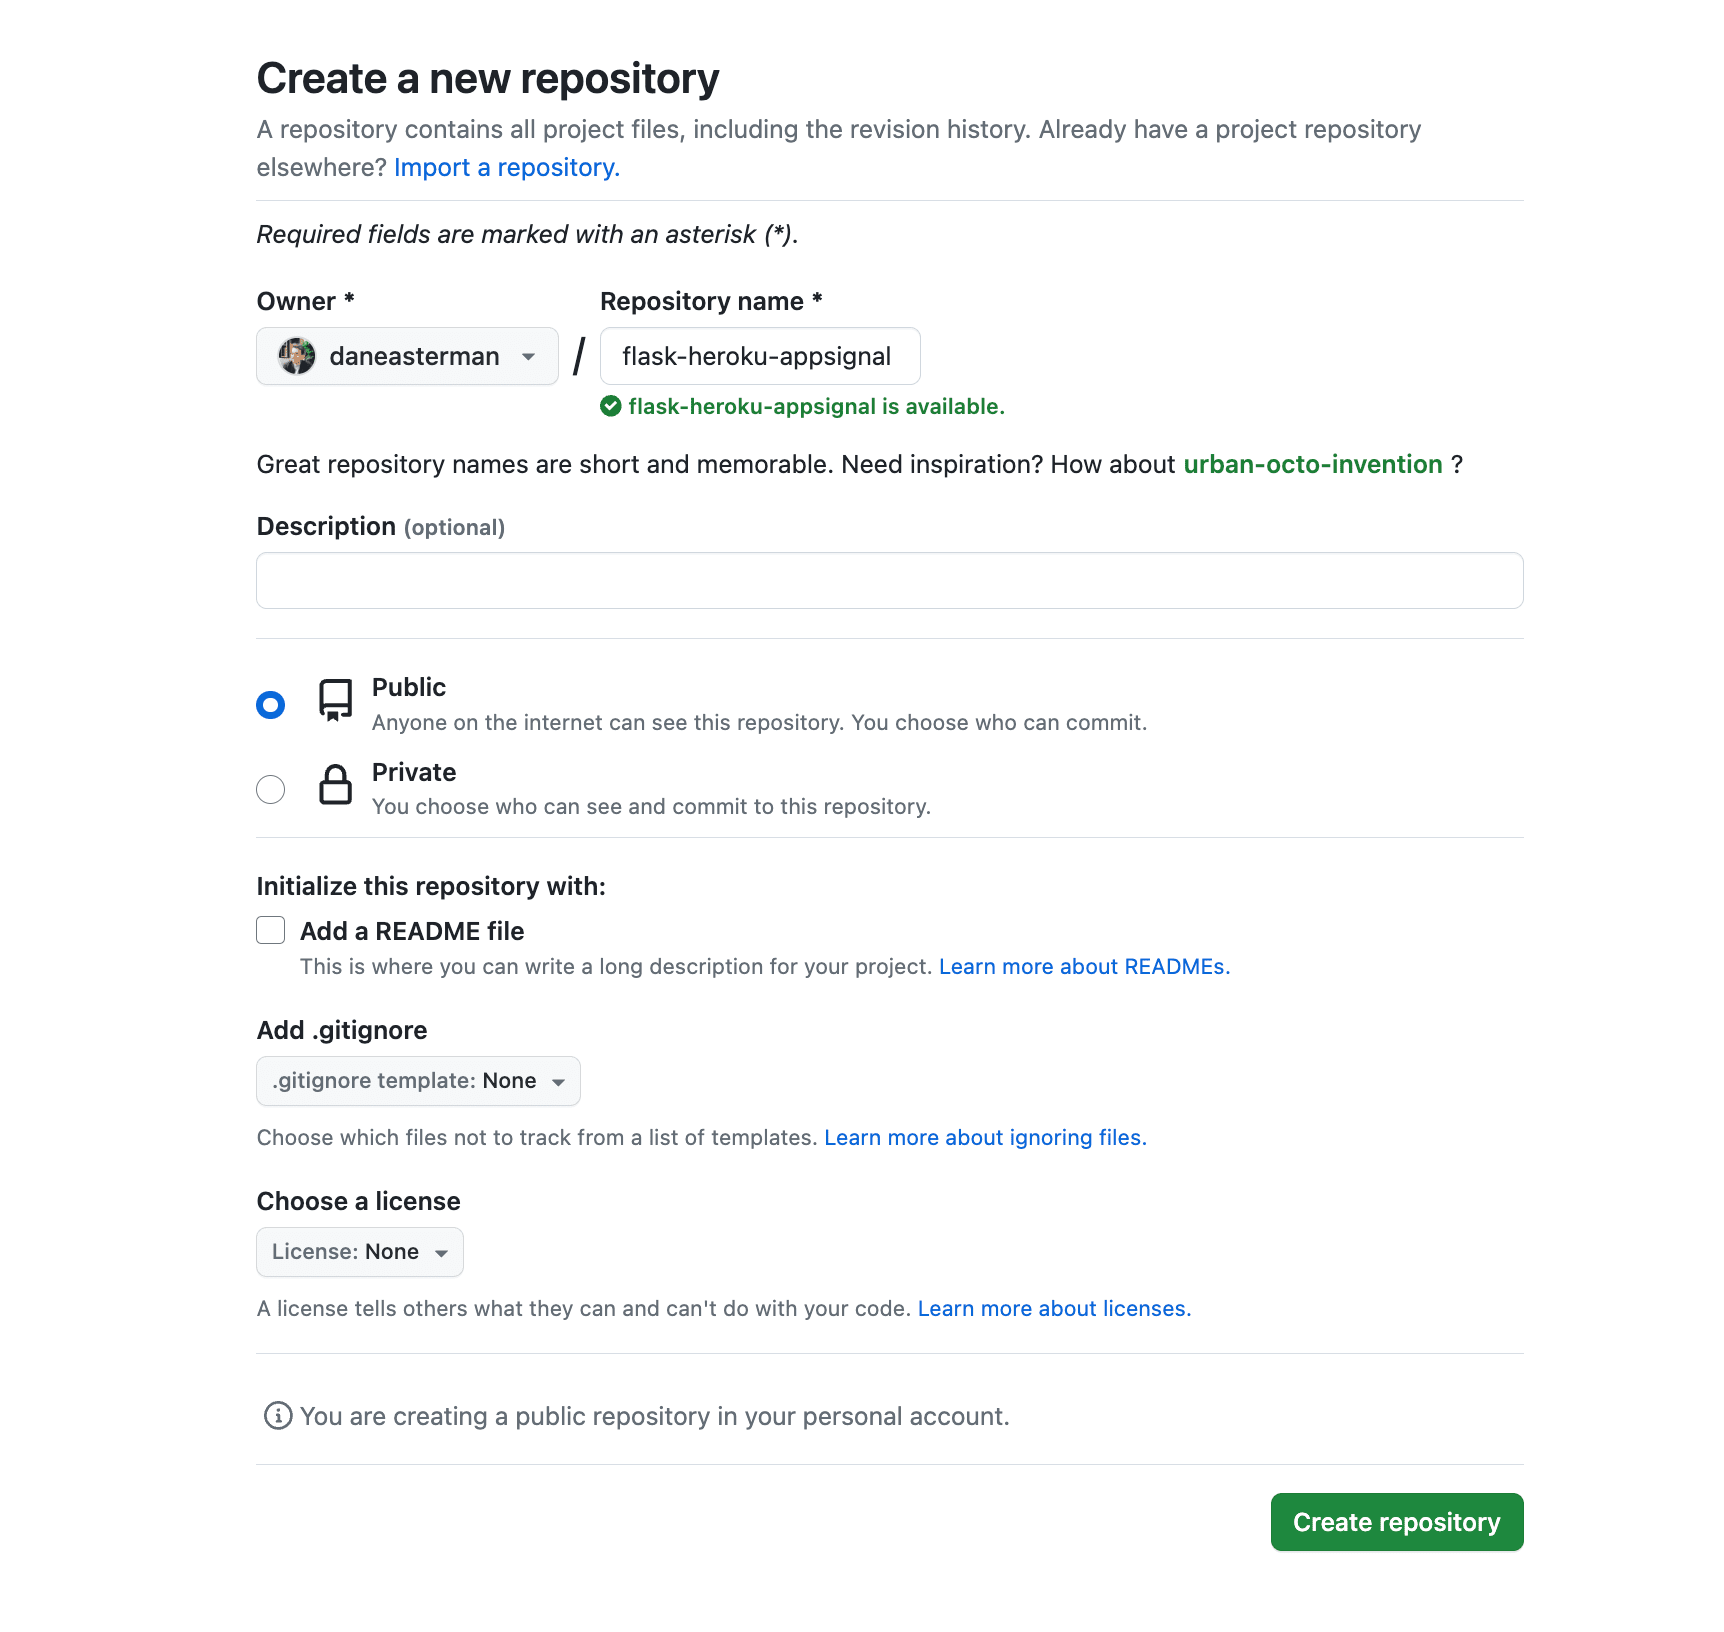
Now we simply need to follow GitHub's instructions and push the code from our existing local repository to the remote one.
To double-check that the local and remote repositories have been linked correctly, run this command in the project directory:
git remote -v
We should get something very similar to the following output:
origin  https://github.com/daneasterman/flask-heroku-appsignal.git (fetch)
origin  https://github.com/daneasterman/flask-heroku-appsignal.git (push)
With the GitHub steps complete, we can start getting set up on Heroku by first creating a new app.
Heroku Deployment
We need to make sure that we have Heroku's special Procfile at the root of our project. The Procfile is a configuration text file specifying the various process types that will run when your app starts up. Without this, your app will not run on Heroku.
Copy the line below and add it to your Procfile:
web: gunicorn app:app
Also, remember the config.py we created in the previous section? We need to update our configuration in Heroku so that the app runs on our production settings, with DEBUG set to False.
First, click on the Setting tab on your Heroku dashboard. Then click the Reveal Config Vars button. Add the variable PROD_APP_SETTINGS and the value config.ProductionConfig.
Next, we need to connect our GitHub repository to Heroku. Click on the "Connect to GitHub" button. Then in the section that appears underneath, search for our flask-heroku-appsignal repository, and finally click on the second "Connect" button below.
Then click the "Enable Automatic Deploys" button. This means that every time you push your code to the main branch on GitHub, it will trigger an automatic deployment to Heroku.
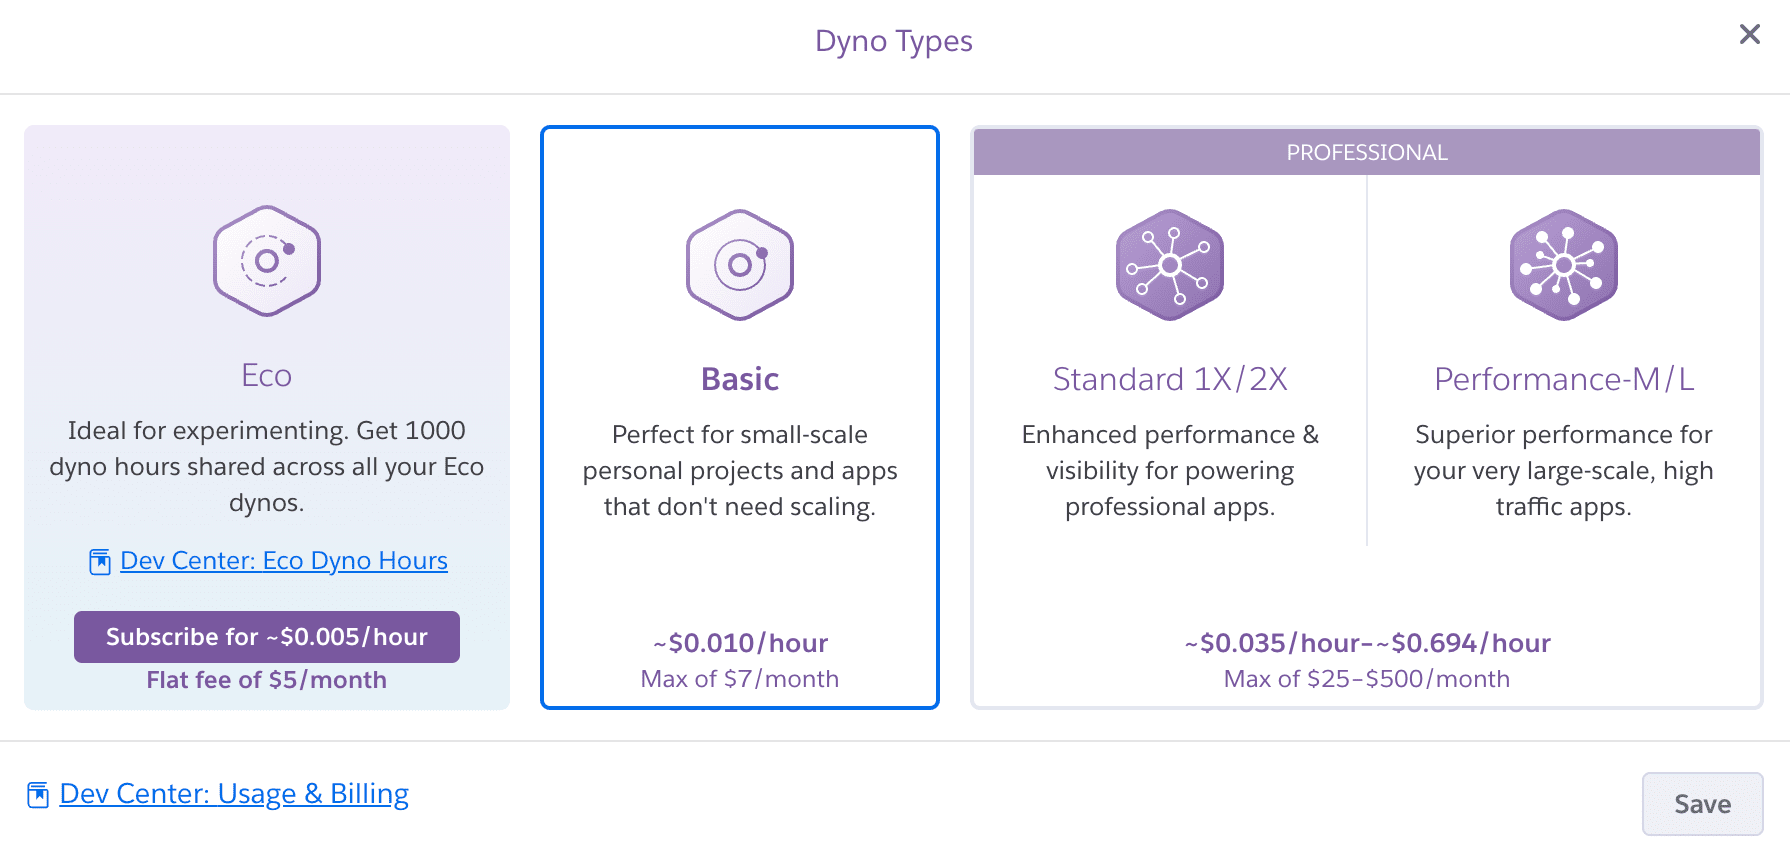
Unfortunately, Heroku doesn't provide a free tier for demo apps anymore. So to complete the proof-of-concept for our flask-heroku-appsignal app, we need to purchase a dyno-type subscription.
This is where Heroku is a little cheeky and automatically puts you in the slightly more expensive Basic Plan. To change this, click on the Resources tab and then click: Change Dyno Type, which will bring up a modal screen. Finally select the Eco dyno, which will be absolutely fine for our purposes:
And we're done!
Wrapping Up
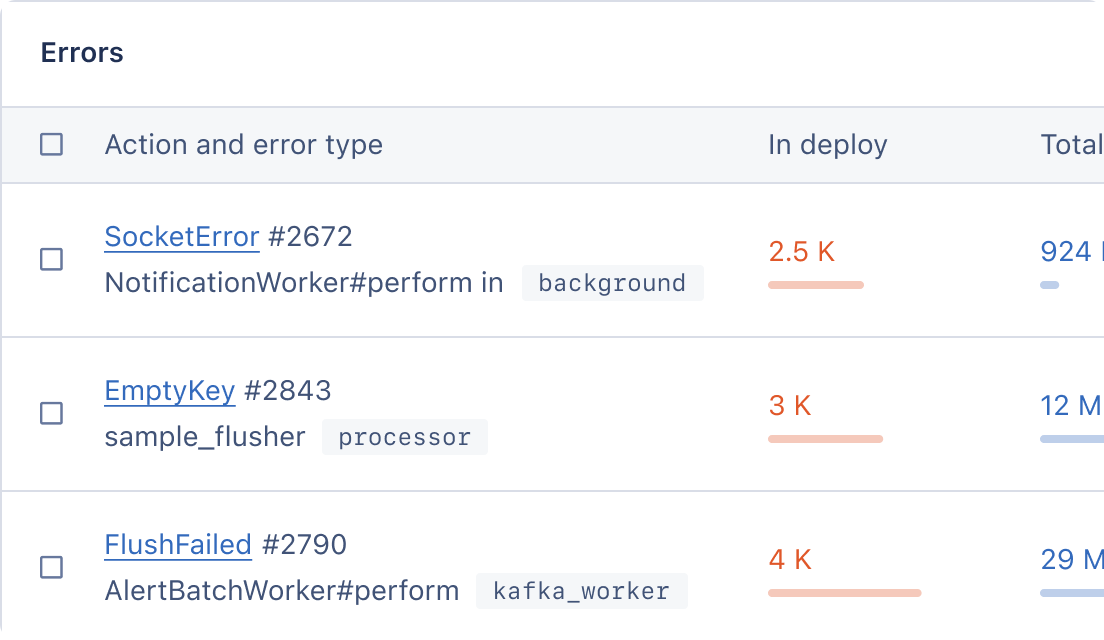
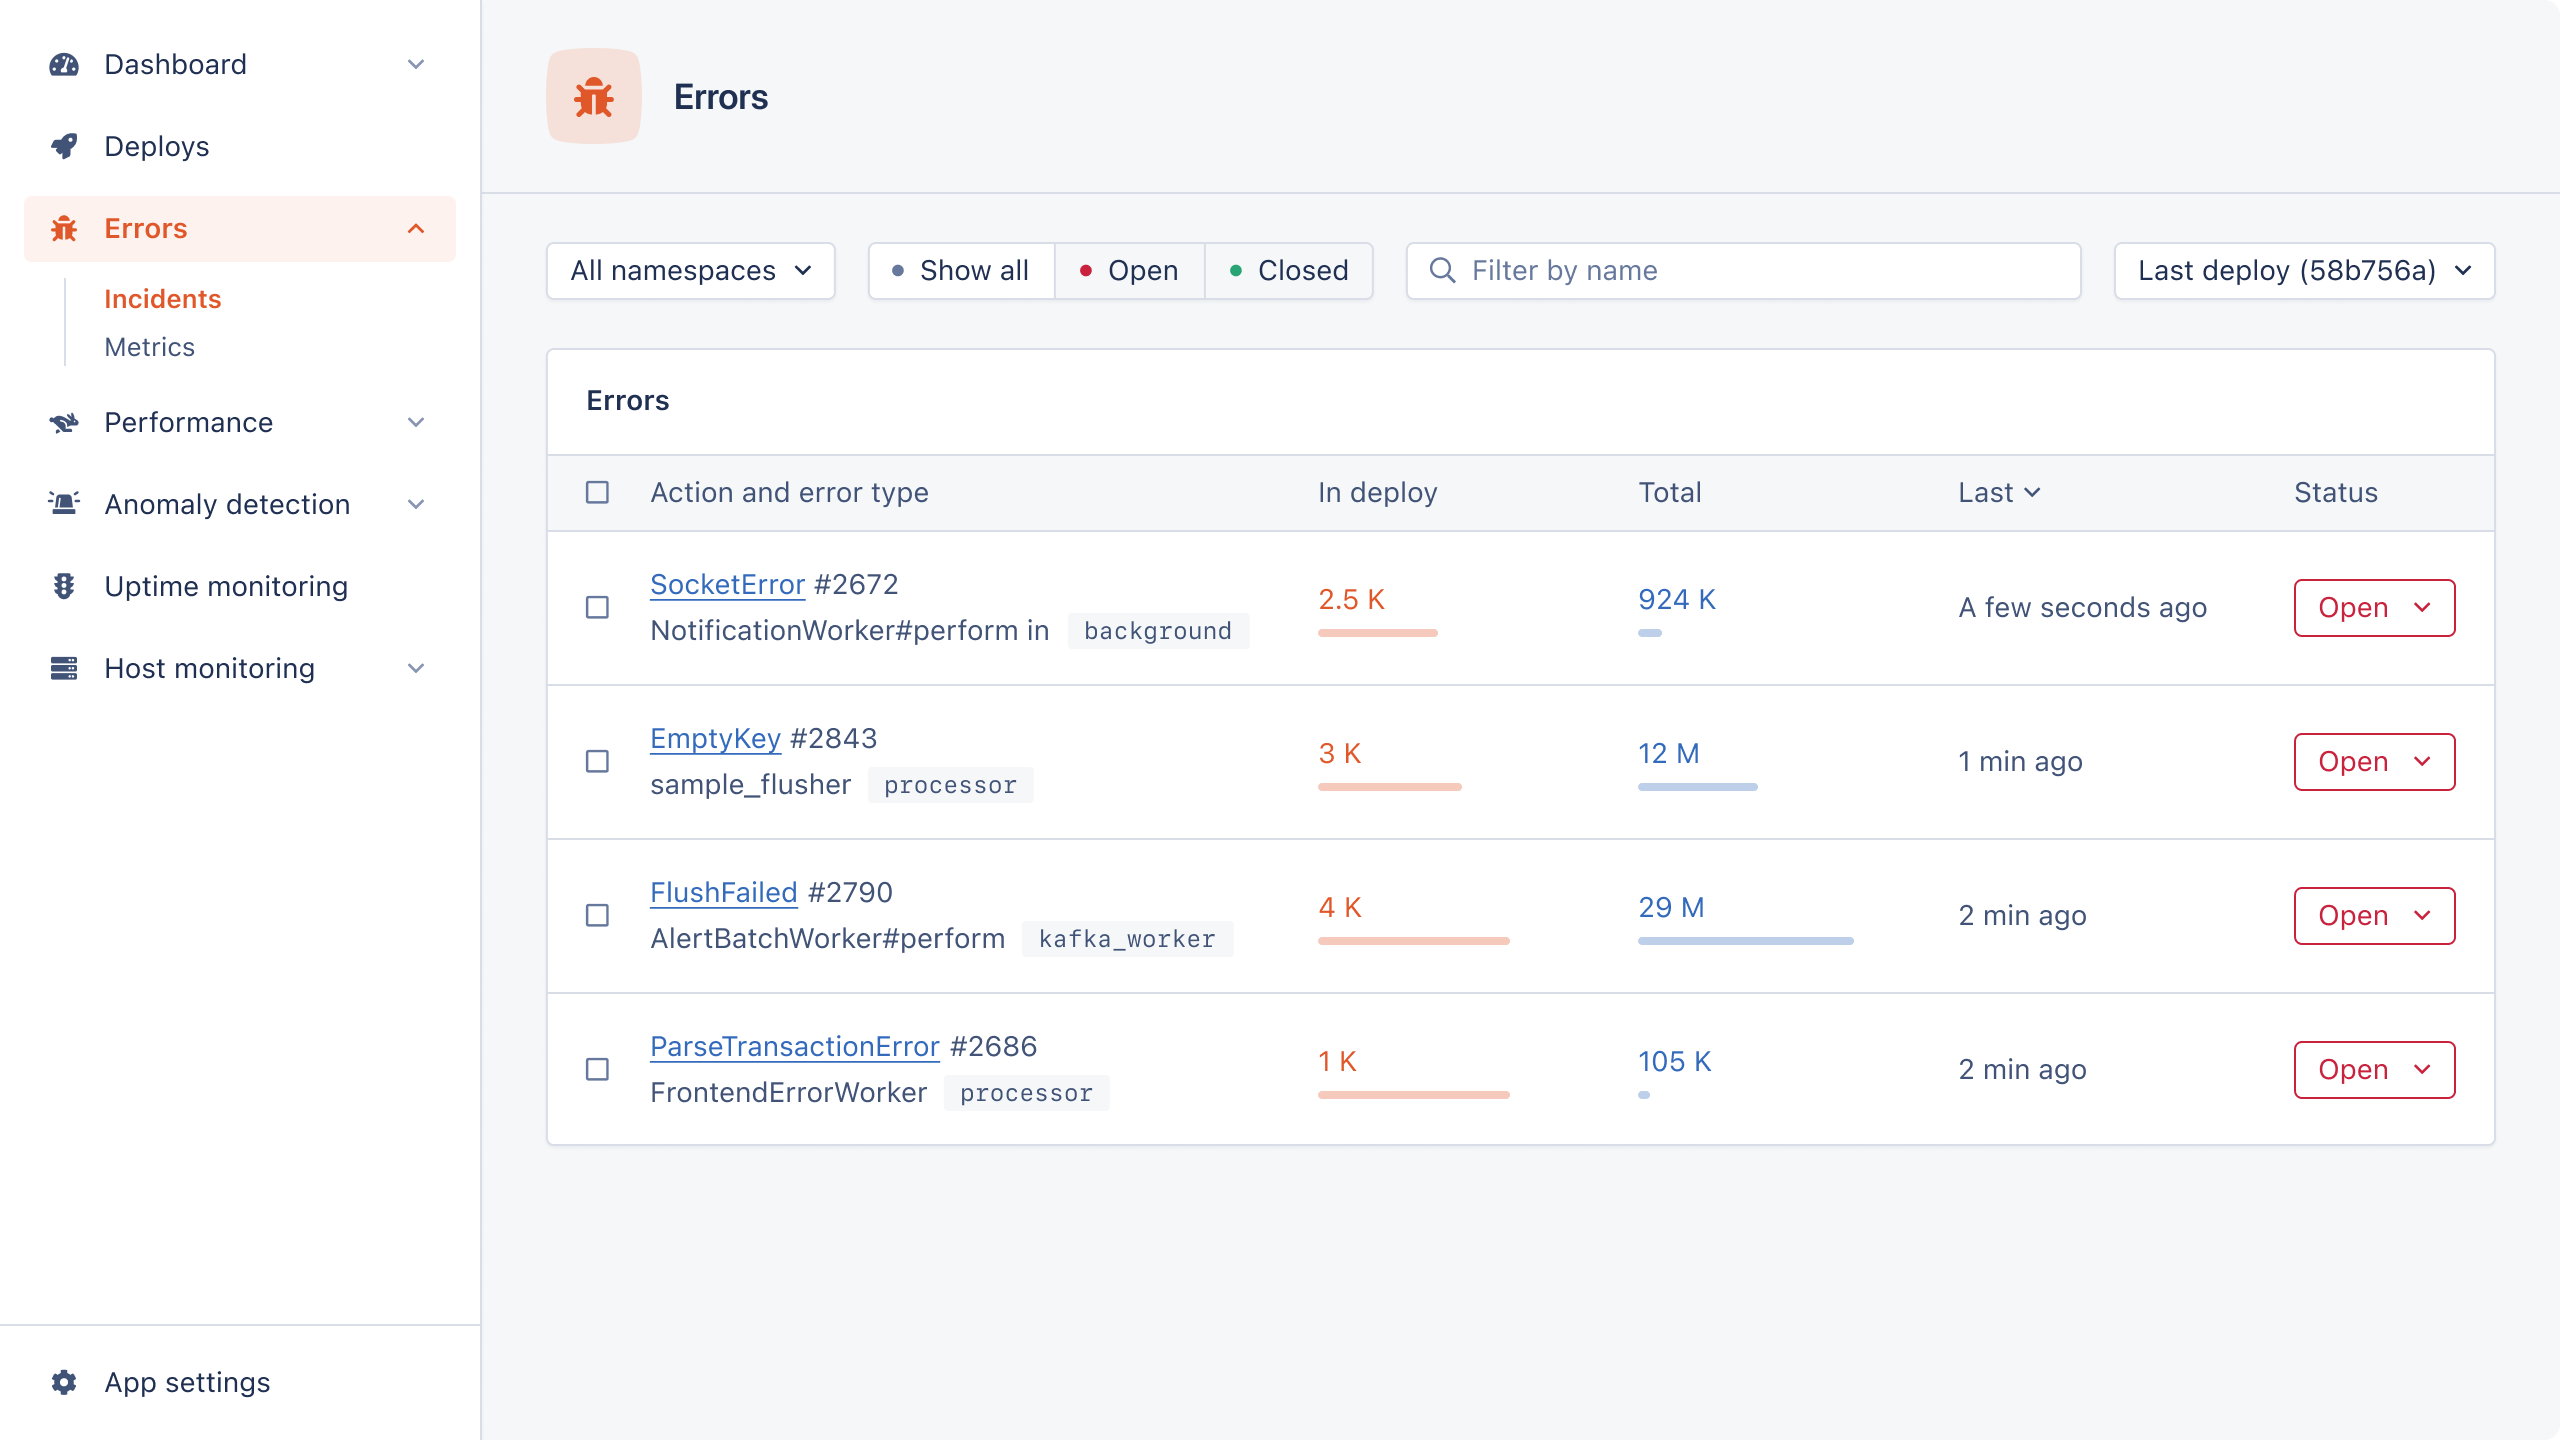
That concludes this introduction to deploying your Flask app to Heroku. Once you build out your web app with more functionality, you can think about installing the AppSignal add-on for Heroku, which now supports Python and Flask apps.
With this add-on, you can track errors, monitor performance, get access to advanced metric dashboards, and more. Happy building!
P.S. If you'd like to read Python posts as soon as they get off the press, subscribe to our Python Wizardry newsletter and never miss a single post!