
Sidekiq allows Ruby developers to maintain fast and responsive web applications by moving time-consuming tasks into the background.
With multithreading at its core, Sidekiq can process many jobs at once. This makes Sidekiq an important part of Ruby or Rails applications that handle heavy loads or perform tasks like sending emails or processing files. Without background processing, long-running tasks would block your application's main thread, resulting in slow response times and a poor user experience.
In this post, we'll focus on effectively utilizing Sidekiq to manage and process background jobs.
Let's get started!
The Basics of Sidekiq
In essence, Sidekiq is a full-featured background processing framework for Ruby. It lets you run background tasks concurrently, crucial for responsive and reliable web applications. Whether sending emails, resizing images, or processing CSV files, time-consuming tasks can be done behind the scenes using Sidekiq.
Sidekiq's architecture relies heavily on multithreading and the concept of
"workers". However, as of Sidekiq 6.3.0, the Sidekiq::Worker module has been deprecated in favor of Sidekiq::Job as the terminology "worker" can be confusing:
Are you talking about a process? A thread? A type of job? I encourage developers to stop using the term worker.
Redis, a lightning-fast in-memory database, plays an essential role here, acting as the queue system that stores these background jobs.
Note: While Sidekiq does rely on Redis for storage, we won't be getting into the details of Redis configuration and usage in this article.
Installation and Setup of Sidekiq for Rails
To begin, you'll need to run Ruby version 2.5 or later and Redis server version 4 or later.
Now you're ready to install the Sidekiq Ruby gem.
Start by adding Sidekiq to your application's Gemfile:
gem 'sidekiq'
Next, install it in the directory of your project:
bundle install
Now that Sidekiq is installed, you'll need to configure it. In a Rails
application, you configure Sidekiq as your ActiveJob adapter.
Open config/application.rb and add the following line inside the application
class definition:
config.active_job.queue_adapter = :sidekiq
You can further configure Sidekiq by creating a Sidekiq initializer to point to a Redis instance, for example. This is a special script in Rails that runs when your application starts up.
In config/initializers, create
a file named sidekiq.rb. Inside this file, you can specify various Sidekiq
configurations. For instance:
Sidekiq.configure_server do |config|
  config.redis = { url: 'redis://localhost:6379/1' }
end

Sidekiq.configure_client do |config|
  config.redis = { url: 'redis://localhost:6379/1' }
end
This configuration tells Sidekiq to connect to a local Redis server. Of course, in a production environment, you'd replace the local URL with that of your actual Redis server (this is a great place for an environment variable).
And that's it! With Sidekiq installed and configured, you're now ready to start creating and processing jobs in the background of your Rails application.
Setting Up a Sidekiq Job
Here's how you set up and initialize a basic Sidekiq job:
require 'sidekiq'

class SomeNameForAJob
  include Sidekiq::Job

  def perform(name, count)
    # Actual implementation of the task to run in the background goes here
  end
end
To actually queue a job to run, you call the perform_async method on
the job class, like this:
SomeNameForAJob.perform_async('some_name', 42)
This line adds a job to the default queue that executes as soon as a job
becomes available. The arguments 'some_name' and 42 are passed to the perform method SomeNameForAJob upon execution.
From here, the Sidekiq client pushes the job into a queue in Redis, and the Sidekiq server pulls that job out of the queue when it's ready to process it.
Creating Your First Sidekiq Job
In Sidekiq, jobs are represented by job classes, and the
tasks they need to perform are defined in a perform method. Let's create a basic Sidekiq job:
class HelloNameJob
  include Sidekiq::Job

  def perform(name, times)
    times.times do
      puts "Hello, #{name}!"
    end
  end
end
In this code snippet, we've created the class HelloNameJob. This takes two arguments: name and times. When performed, it prints
a greeting to the console a specified number of times. This is, of course,
a simple example. In a real-world application, the perform method can
contain any code you want to run in the background.
Now execute your job. Simply call the perform_async method on the class and
pass in any arguments your perform method expects. Here's how we
can schedule the HelloNameJob we've just created:
HelloNameJob.perform_async('Jeff', 5)
This will enqueue a job to print "Hello, Jeff!" five times.
If you need a job to be performed at a particular time, you can use the
perform_in or perform_at methods. For example:
HelloNameJob.perform_in(5.minutes, 'Meredith', 3)

HelloNameJob.perform_at(2.days.from_now, 'Jeff', 2)
In these examples, 'Meredith' will receive her greeting three times in five minutes, while 'Jeff' will have to wait two days to receive his greeting two times.
Advanced Sidekiq Usage
Sidekiq is not restricted to offloading work to the background. It also offers advanced features that allow you to configure your jobs, including job retries and job prioritization.
Automatic Job Retries
One of Sidekiq's most powerful features is automatic job retries. By
default, if a job fails due to an unhandled exception, Sidekiq will
retry the job with an exponential backoff. You can customize the number
of retries by specifying sidekiq_options in your class
like this:
class ThisJob
  include Sidekiq::Job

  sidekiq_options retry: 10

  def perform(args)
  end
end
In this example, if a job fails, Sidekiq will retry it ten times before giving up.
Job Prioritization
Job prioritization is another advanced feature that Sidekiq provides. You can control the priority of your jobs by assigning them to different queues and setting the priority of each queue. Here's how you can specify a queue when defining a job:
class ThisJob
  include Sidekiq::Jobs

  sidekiq_options queue: 'critical'

  def perform(args)
  end
end
In this example, jobs for ThisJob will be placed in the
critical queue. When starting your Sidekiq server, you can then specify
the order in which queues should be processed.
These are just a couple of examples of how Sidekiq's advanced features can be leveraged to fine-tune your background job processing. With Sidekiq, you have the tools to ensure that your jobs are processed efficiently, reliably, and in a way that best suits your application's needs.
Monitoring and Scaling with Sidekiq
Sidekiq comes with standard features for monitoring and scaling your job processing capabilities. A web-based dashboard gives you a real-time view of your job queues. You can see the number of processed and failed jobs, as well as detailed information about current and scheduled jobs.
To use the Sidekiq dashboard, mount
it in your Rails routes file. In config/routes.rb, add:
require 'sidekiq/web'
mount Sidekiq::Web => '/sidekiq'
After adding these lines, you can access the dashboard by navigating to '/sidekiq' on your server.
Monitoring Sidekiq with AppSignal
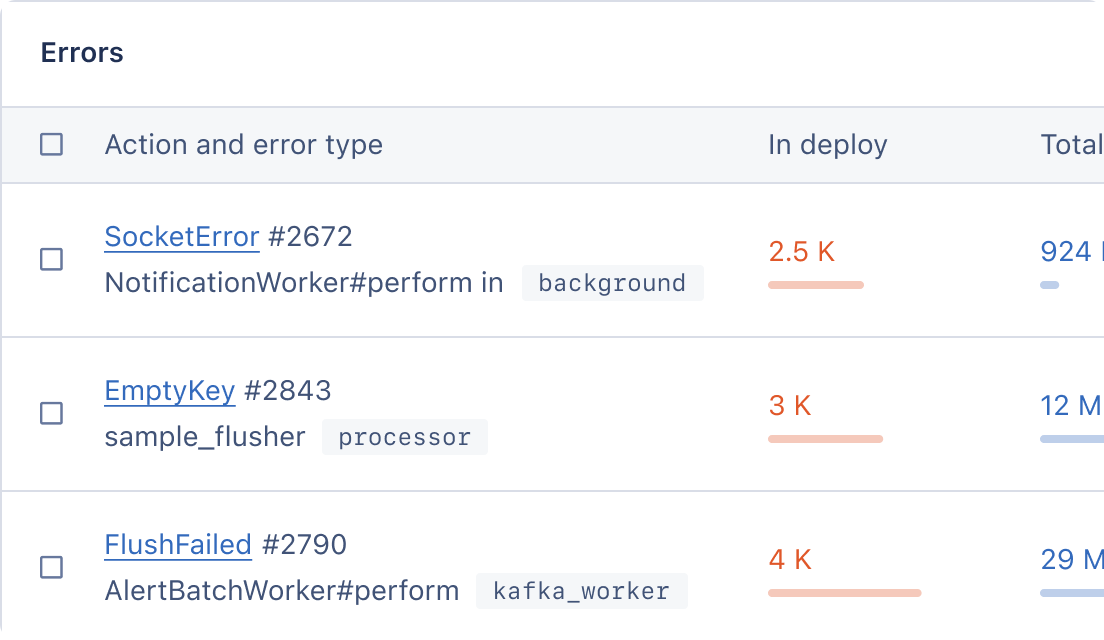
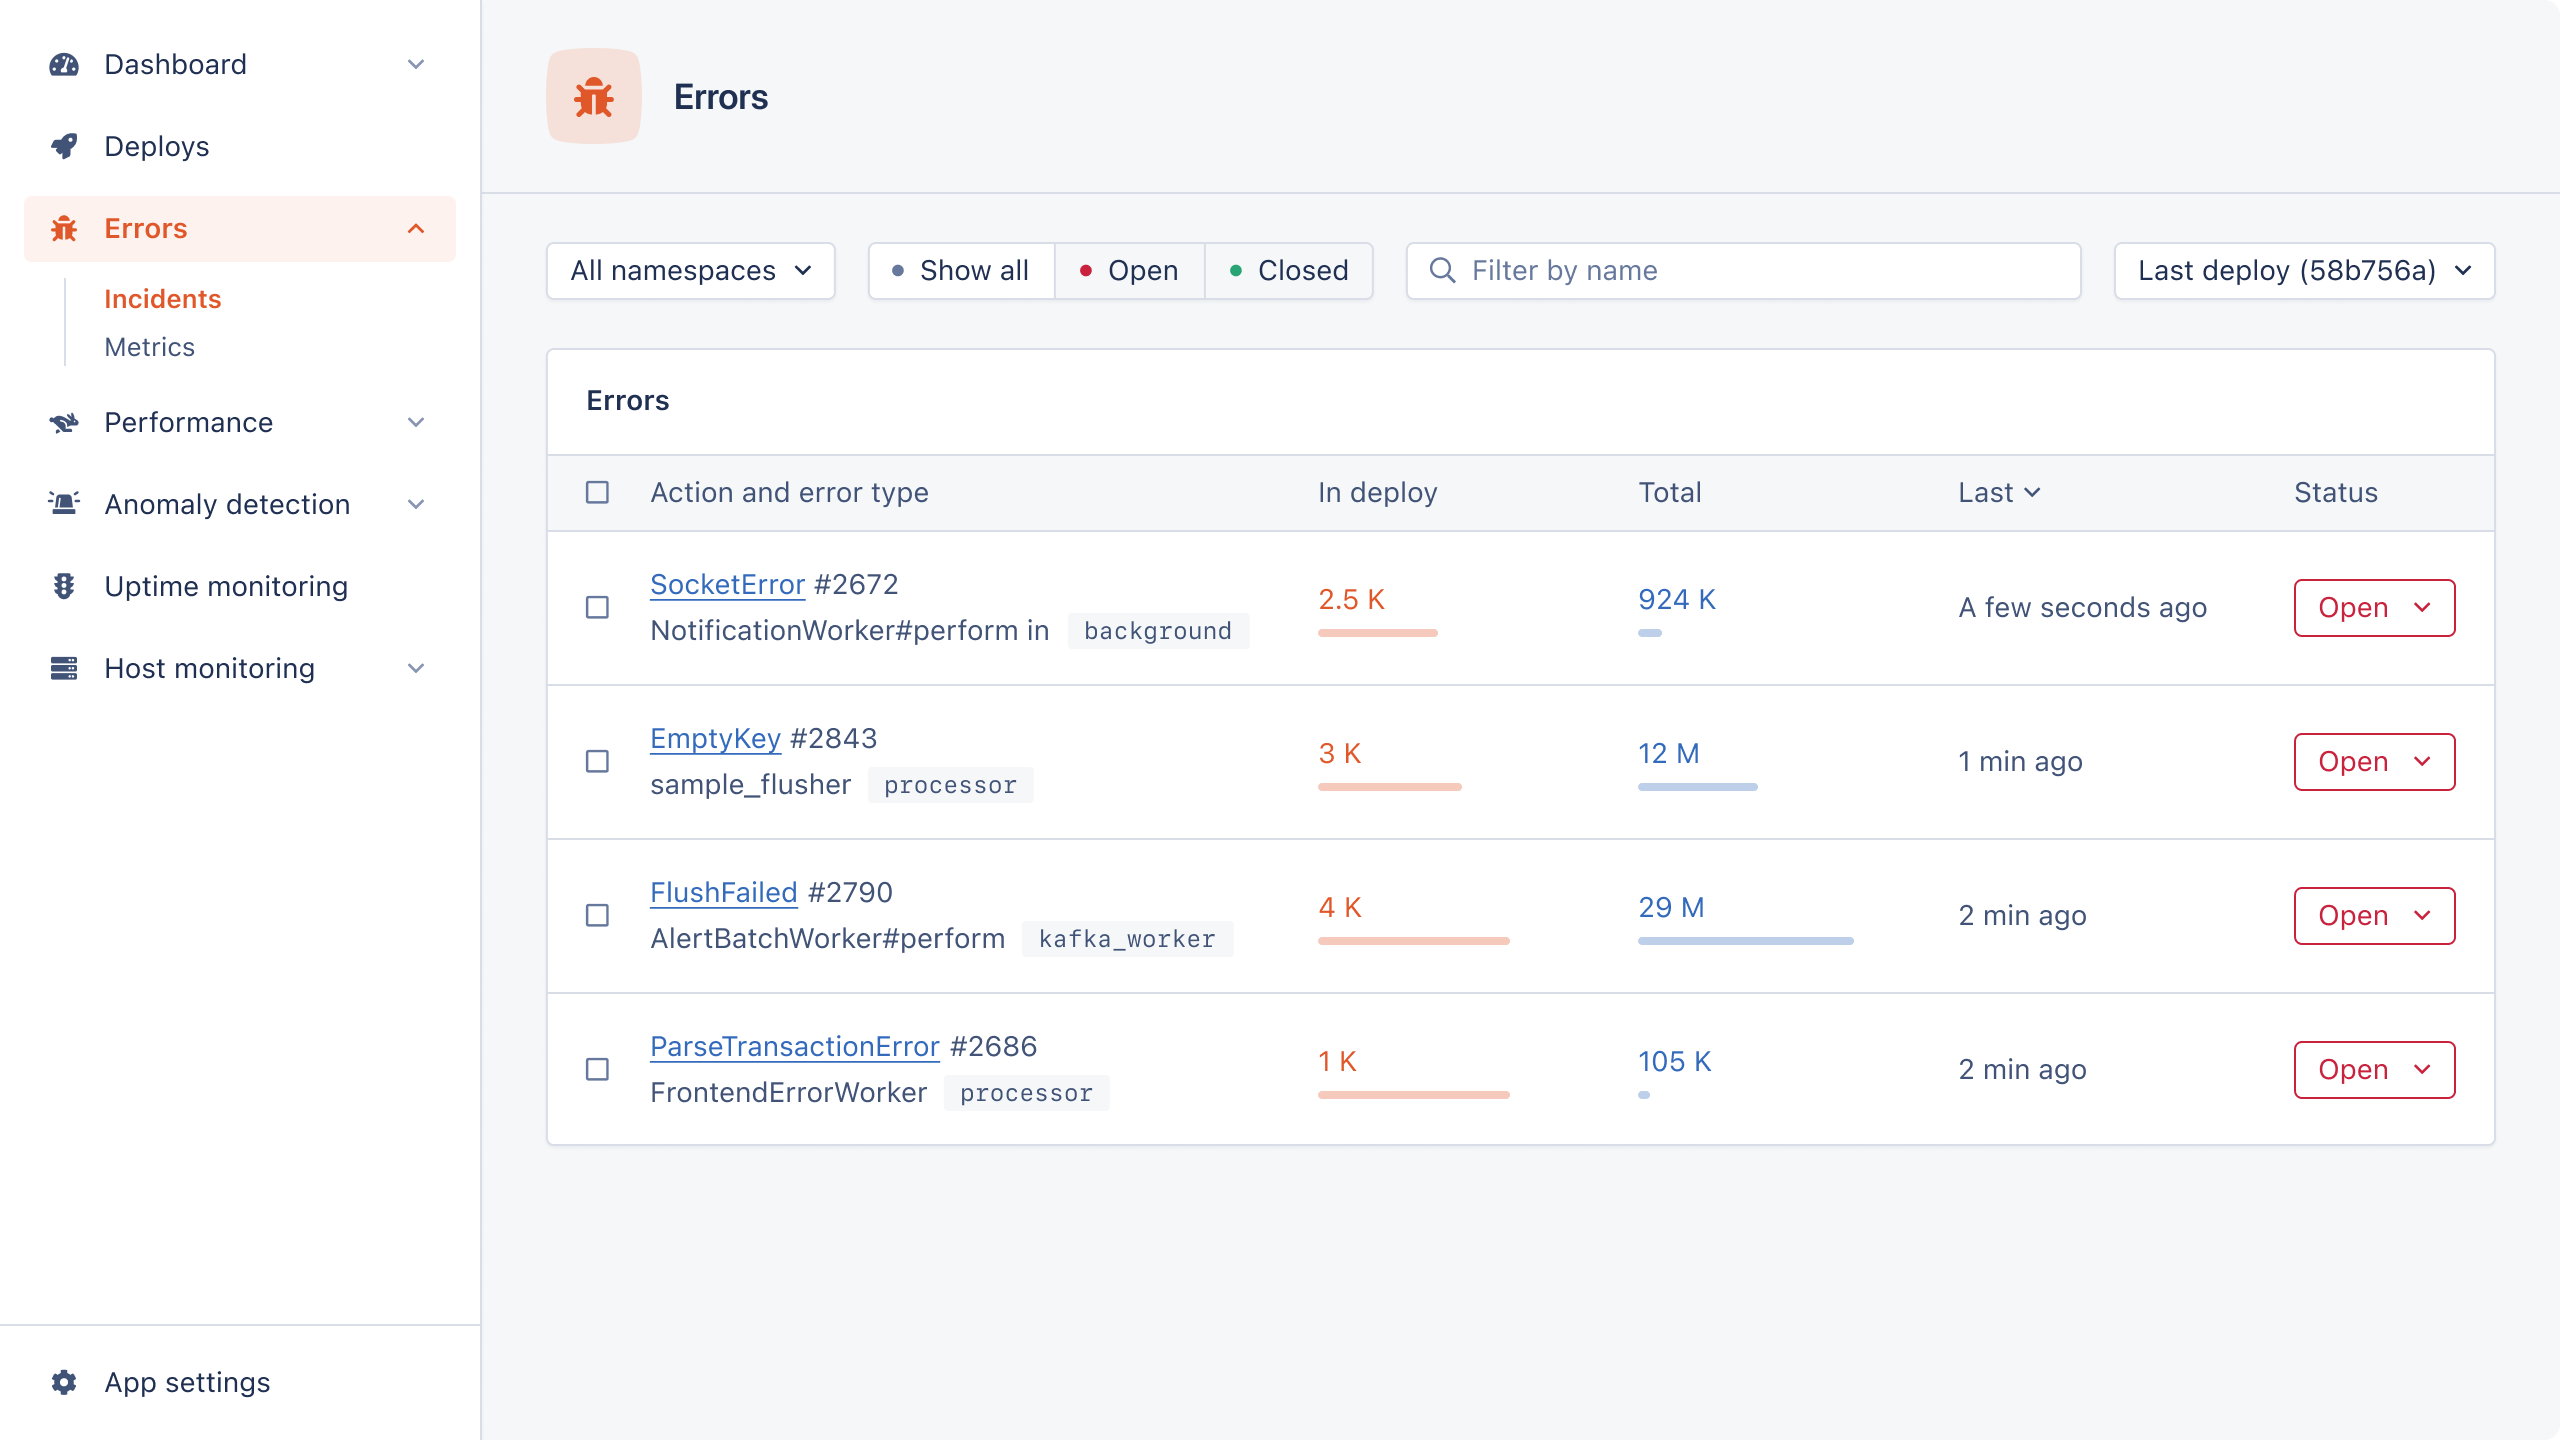
For more comprehensive monitoring, Sidekiq integrates well with application performance monitoring tools like AppSignal. AppSignal's Sidekiq dashboard provides detailed insights into your Sidekiq jobs, including failed and retried jobs, job duration, and Redis memory usage.
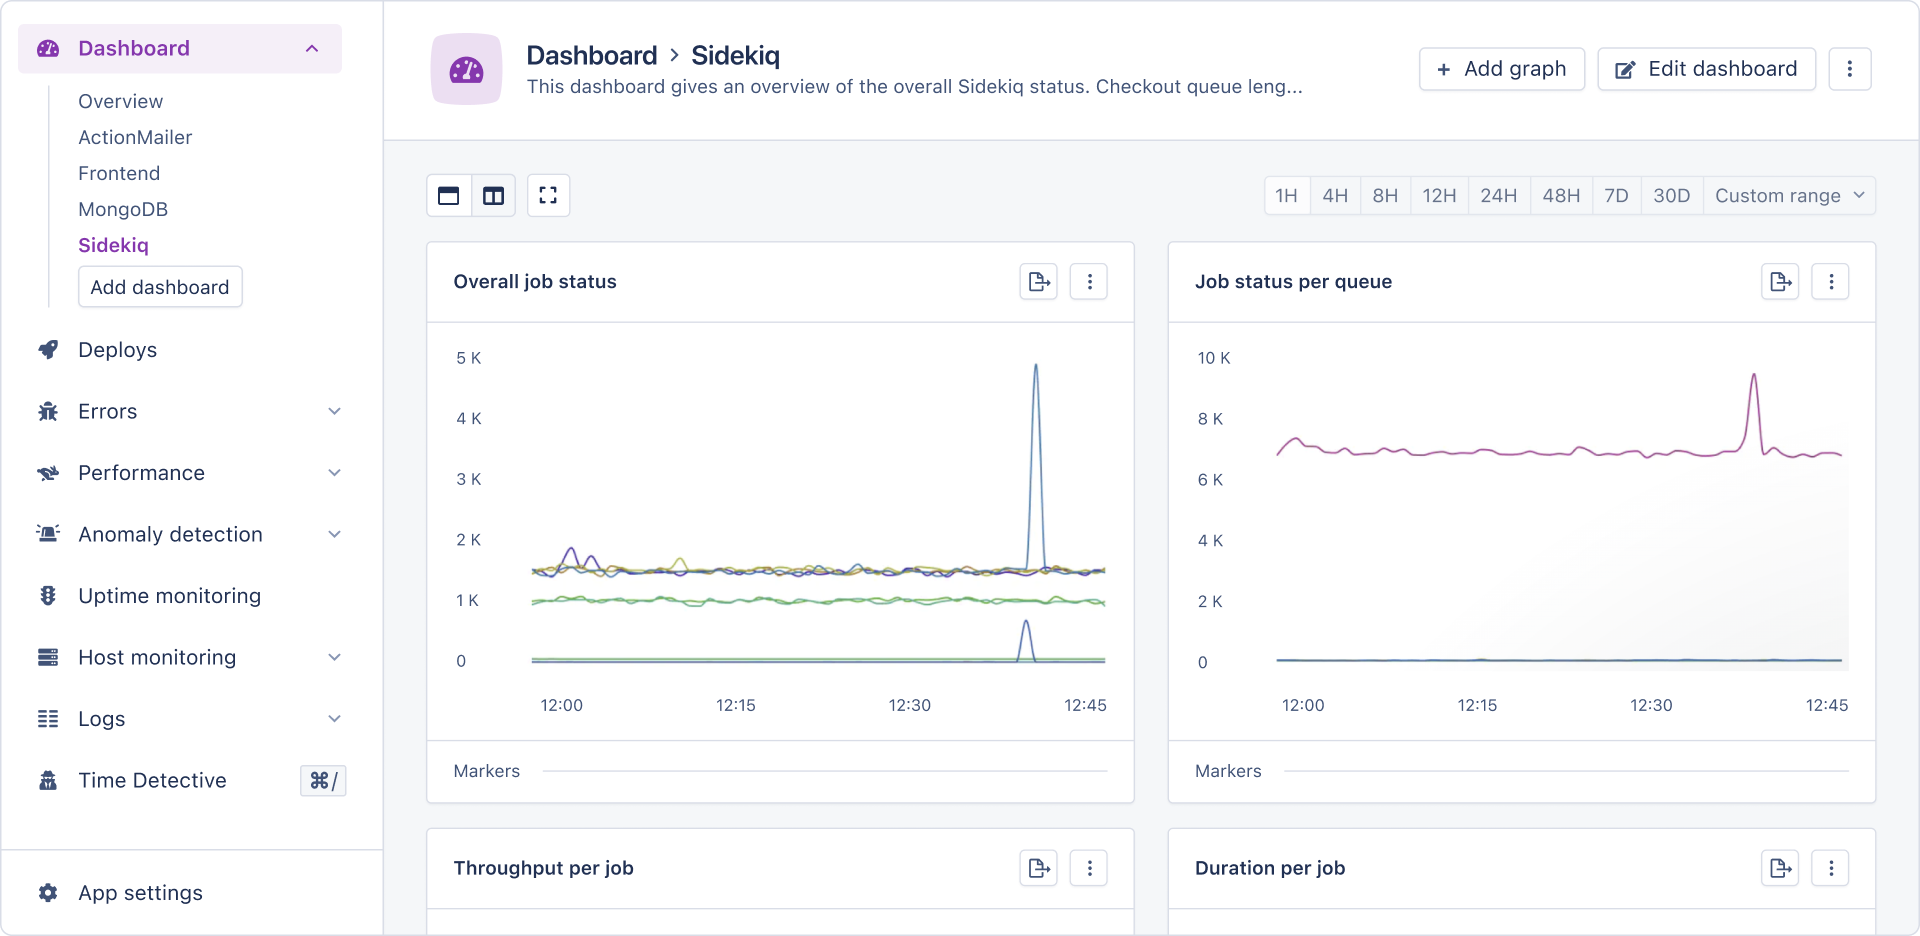
This kind of information is invaluable for identifying bottlenecks as you scale your application. Beyond that, AppSignal's alerts help you stay on top of anomalies like queue length, so you know when your queues have grown.

Integrating AppSignal into your Sidekiq setup with Rails is simple. AppSignal's Ruby gem inserts into the Sidekiq server middleware without any extra configuration. This also works with ActiveJob!
You can even use AppSignal for a Sidekiq application that doesn't run on Rails, using the setup mentioned in the docs.
A Sidekiq Use Case
Two of the most common use cases for Sidekiq are asynchronous emailing and scheduled report generation. Let's take a closer look at one of these examples.
Emails, particularly those with large attachments or numerous recipients, can take a significant amount of time to send. By handling email sending in a background job, your application can continue to respond to user requests while an email is being processed.
Here's a simple example of a Sidekiq job for sending emails in a Rails application:
class ResetPasswordJob
  include Sidekiq::Job

  def perform(user_id)
    UserMailer.reset_password_email_email(user_id)
  end
end
In this example, ResetPasswordJob uses the UserMailer class
to send a password reset email to a user. To enqueue an email to send, you call ResetPasswordJob.perform_async(user_id) from
somewhere else in your application.
However, in a typical Rails application, you often don't need to create a separate Sidekiq job for sending emails. Rails provides the Action Mailer framework, which is used to send emails and integrates nicely with Active Job for background processing.
Here's an example of how you might use Active Job and Action Mailer to send a password reset email:
class UserMailer < ApplicationMailer
  def reset_password_email(user_id)
    mail(to: User.find(user_id).email, subject: 'Password Reset')
  end
end

# elsewhere in your application
UserMailer.reset_password_email(user_id).deliver_later
In this example, calling deliver_later on the mailer automatically enqueues the
email to be sent as a background job. Behind the scenes, Active Job uses Sidekiq
to manage these jobs.
But if you want more control over your jobs — e.g., you want to customize retry behavior or queue prioritization — or if you're dealing with tasks that don't integrate with Active Job as easily as Action Mailer, then it's appropriate to create separate Sidekiq jobs.
This flexibility, along with Sidekiq's performance and ease of use, makes it a valuable tool for handling various background tasks in Rails applications.
Wrapping Up
In this post, we walked through an introduction to Sidekiq, exploring its basics, diving into installation and setup, and creating and executing useful jobs.
We also touched on Sidekiq's more advanced features, looked at real-world use cases, and discussed its crucial role in improving the performance and scalability of Ruby applications.
Armed with the knowledge from this introduction, you're now equipped to start using Sidekiq more effectively in your own Rails apps.
Happy coding!
P.S. If you'd like to read Ruby Magic posts as soon as they get off the press, subscribe to our Ruby Magic newsletter and never miss a single post!