
Mongoose is Object Data Modeling (ODM) for MongoDB. It represents application data as JavaScript objects, mapped to the underlying MongoDB database.
You can use Mongoose to model data, enforce schemas, validate models, and manipulate data in a database without familiarity with the underlying database semantics.
In this tutorial, you will build an Express server with Mongoose that serves a RESTful API.
Let's get started!
Prerequisites
To follow this tutorial, you will need:
- Node.js v18 or higher installed on your machine. Take a look at the Node.js documentation to install the latest version of Node.js with nvm.
- Familiarity with how to build an application using Express.
- MongoDB installed on your machine.
Setting Up Express
In this section, you will build a basic server that serves a single endpoint to verify that Express works. Here's the completed source code for the project that we'll build.
To begin, create a directory for the project:
mkdir blog_app && cd blog_app
Build a package.json file using the -y flag to accept the default settings:
npm init -y
Next, install Express with the following command:
npm install express
Using your preferred editor, open the package.json and add the following line to add ES modules support (remove the comments in the JSON file):
/* blog_app/package.json */
{
  ...
  "type": "module"
}
Next, create an index.js file and add the following to it:
// blog_app/index.js
import express from "express";

const app = express();
const PORT = 3000;

app.use(express.json());
app.use(express.urlencoded({ extended: true }));

app.get("/", (request, response) => {
  response.send({ message: "Hello from an Express API!" });
});

app.listen(PORT, () => {
  console.log(`Server running at http://localhost:${PORT}`);
});
In the first line, you import Express and then set the app variable to an instance of Express. Following that, you add middleware to parse data from the HTTP requests. Next, you create a / endpoint using the app.get() method to send a hello message upon receiving a GET request. Finally, you call app.listen() to start a server and listen on the given port.
Now save your file, and then run it with the node command:
node index.js
Server running at http://localhost:3000
The output confirms that the server is running on port 3000.
Open a second terminal and enter the following command to send a GET request:
curl http://localhost:3000
{"message":"Hello from an Express API!"}
The output shows the hello message from the basic server you created.
Alternatively, you can open your browser and visit http://localhost:3000 to see the output.
Now that the Express server is running, we will add Mongoose to the project.
Integrating Mongoose with Express
In this section, we will install Mongoose and integrate it with the Express server.
First, install Mongoose in your project directory:
npm install mongoose
Create a config directory, and add a db.js file with the following code:
// blog_app/config/db.js

import mongoose from "mongoose";

export default function connectDB() {
  const url = "mongodb://127.0.0.1/blog_db";

  try {
    mongoose.connect(url, {
      useNewUrlParser: true,
      useUnifiedTopology: true,
    });
  } catch (err) {
    console.error(err.message);
    process.exit(1);
  }
  const dbConnection = mongoose.connection;
  dbConnection.once("open", (_) => {
    console.log(`Database connected: ${url}`);
  });

  dbConnection.on("error", (err) => {
    console.error(`connection error: ${err}`);
  });
  return;
}
First, you import the Mongoose module. You then define a connectDB() function to connect to the MongoDB database. In the function, you define a try...catch block to handle initial connection errors, such as MongoDB not running. In the try block, you set a url variable to a connection string that contains the blog_db database name for our app. Next, invoke mongoose.connect() with the connection string to initiate a connection with MongoDB. If an error occurs before the connection, the catch block catches and logs the error, and then exits the application.
Following that, attach an open event listener that logs a success message if the connection is successful. If there is an issue connecting, the error event is fired, which logs an error message.
What to Consider For a Real-World Node.js Application
In our demo code, if the connection to the database fails, we just log an error. But in a real Node.js app, you should consider the following:
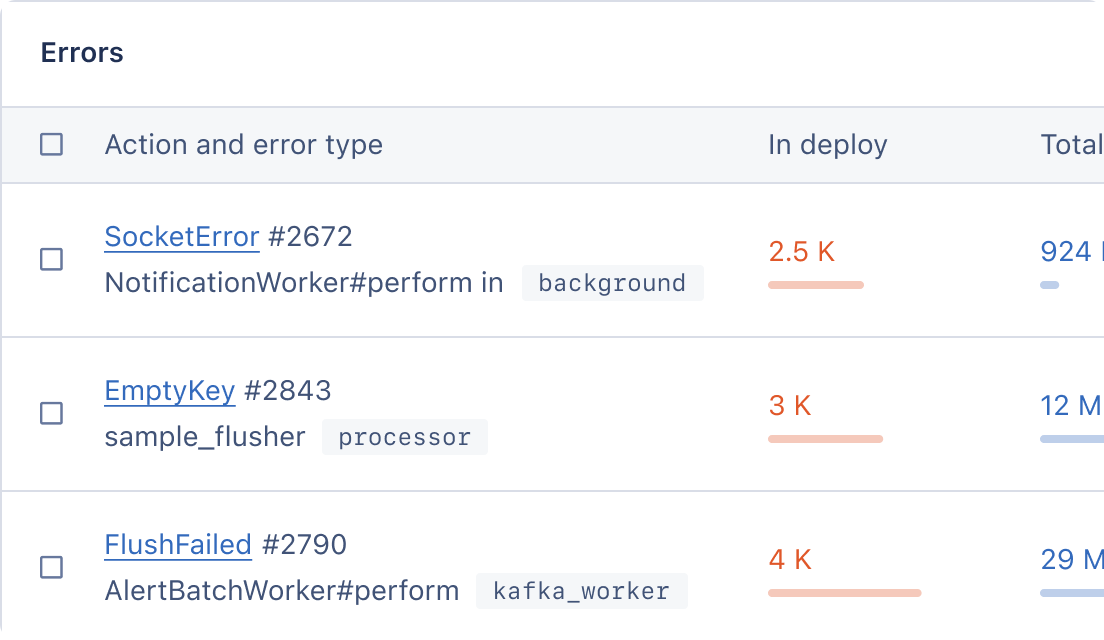
- Store the error to help with debugging: Consider logging the error somewhere it can be permanently stored, like an Application Performance Monitoring (APM) tool. In addition, you could notify your team of the issue, so they can review the logs and troubleshoot the issue. AppSignal offers error monitoring, logging, and reporting, so it can help you stay on top of any issues with your database.
- Retry the connection: Sometimes, a failed database connection may be temporary. Usually, when a connection fails, you should retry. Set a limit on the number of retries though, otherwise you'll enter an infinite loop.
- Graceful degradation: If the database connection isn't needed for certain functionality, you can disable some features to prevent crashes and give users appropriate error messages (e.g., "Sorry, we are currently experiencing X... try again later").
- Implement a failover cluster: create a standby database to take over if the primary database fails.
In your index.js file, import and call the connectDB function to create a connection to the MongoDB instance:
// blog_app/index.js
import express from "express";
import connectDB from "./config/db.js";   // <- add this

const app = express();
...

connectDB();                             // <- add this

app.get("/", (request, response) => {
   ...
});
...
Save and run the project. The output will look like this:
Server running at http://localhost:3000
Database connected: mongodb://127.0.0.1/blog_db
This confirms that Express can successfully connect to MongoDB using Mongoose.
Now that the database connection is successful, we will define the application's schema and model.
Creating Schema and Models with Mongoose
In this section, we will create schema for our application to define the data structure.
When creating a schema, you can define the fields you want, the type of data to store, and any constraints. After defining the schema, you will create a model.
In the root directory, create a models folder and add an article.js file with the following:
// blog_app/models/article.js
import mongoose from "mongoose";

const ArticleSchema = new mongoose.Schema({
  title: {
    type: String,
    required: true,
  },
  content: {
    type: String,
  },
  date: { type: Date, default: Date.now },
});

const ArticleModel = mongoose.model("Article", ArticleSchema);
export default ArticleModel;
This defines an ArticleSchema, which consists of the following fields:
title: The title of the article using theStringtype. Setting therequiredproperty totruemakes the field mandatory.content: The article content, also stored with theStringtype.date: The date the article was published. You specify theDatefield type and set it to the current time if a user does not provide the date using thedefaultoption.
Next, you invoke mongoose.model() to create a model from the schema, and then export it to be used in other files.
Now that you have created the model, you will create an endpoint to save articles in MongoDB.
Adding Data to MongoDB with the POST Method
Now we'll create an endpoint to add articles to MongoDB using Mongoose. The endpoint will be api/articles, and when a user visits the endpoint, we will extract the data from the request body and save it in the database.
In the root directory, create a routes directory, and add an ArticleRouter.js file with the following:
// blog_app/routes/ArticleRouter.js
import express from "express";
import ArticleModel from "../models/article.js";
const router = express.Router();

router.post("/articles", async (request, response) => {
  const article = new ArticleModel(request.body);

  try {
    await article.save();
    response.send(article);
  } catch (error) {
    response.status(500).send(error);
  }
});

export default router;
On the first line, we import the Express module to create a router object. We then import the articleModel from the previous section and invoke express.Router() to create a router object.
Using the router.post() method, we create an /articles endpoint (we will prepend /api to the endpoint soon). When a user makes a POST request, an instance of the ArticleModel is created with the data in the request body. If the data is successfully saved in the database, a response is sent containing the data; otherwise, a 500 HTTP error is returned.
Finally, we export the router object.
At this point, the index.js file will not register the endpoint we have created using ArticleRouter.js. To register it, add the following code to the index.js file:
// blog_app/index.js
import express from "express";
import connectDB from "./config/db.js";
import ArticleRouter from "./routes/ArticleRouter.js";   // <- add this
...
app.use(express.urlencoded({ extended: true }));
app.use("/api", ArticleRouter);   // <- add

connectDB();
...
In the third line, we import the ArticleRouter. We then invoke app.use() with the /api and router object arguments. The first argument — /api — will make Express prepend /api to all the routes defined in the ArticleRouter.js file. When a user wants to save data, they need to hit the /api/articles endpoint.
Testing the API
We can now test our API.
To send a POST request to the endpoint, enter the command:
curl http://localhost:3000/api/articles/ \
    -X POST \
    -H "Content-Type: application/json" \
    -d '{"title":"First article", "content":"Content for the first article"}'
curl is a command-line utility that can make CRUD requests to an API. -X POST specifies that the request uses the POST method. -H specifies the request's content type, which is JSON here. -d accepts the data JSON object that will be embedded in the body of the request.
If you find curl complex, you can also use Postman:
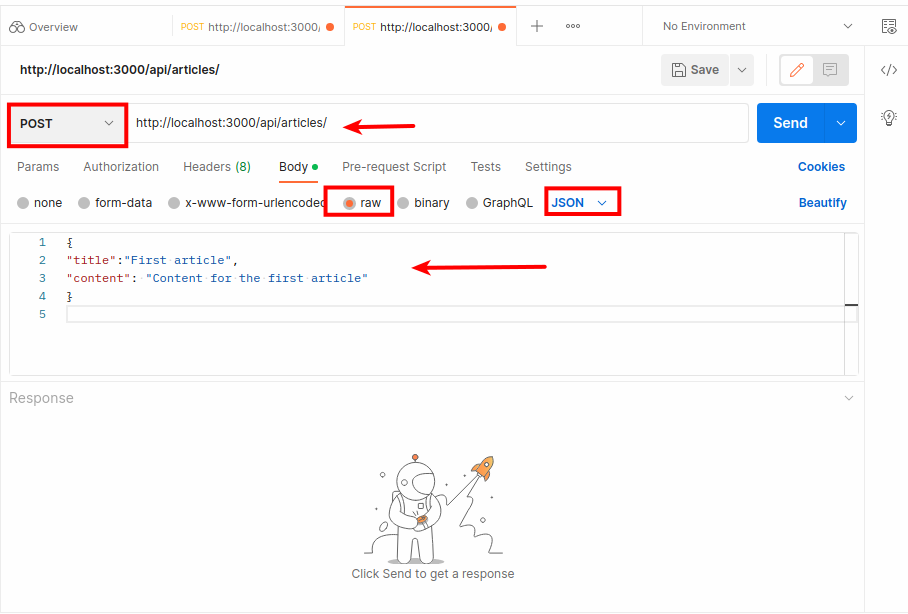
In Postman, you provide the URL, choose the HTTP method as POST, insert the data as JSON, and then press send.
Upon running the curl command, your output will look similar to the following:
{"title":"First article","content":"Content for the first article","_id":"64425979cfca7b6ae9ed5693","date":"2023-04-21T09:38:01.664Z","__v":0}
Let's add another post to the database with curl:
curl http://localhost:3000/api/articles/ \
    -X POST \
    -H "Content-Type: application/json" \
    -d '{"title":"Second article", "content":"Content for the second article"}'
{"title":"Second article","content":"Content for the second article","_id":"644259b7cfca7b6ae9ed5695","date":"2023-04-21T09:39:03.478Z","__v":0}
Now that you have added two articles to the database, you will create an endpoint that fetches all the articles in the database and returns a response.
Return All MongoDB Articles Using the GET Method
In this section, you will create a GET endpoint that retrieves all articles in MongoDB using Mongoose and returns them in JSON format. The endpoint will still be /api/articles, but you will use the GET request this time.
In the ArticleRouter.js file, create the GET endpoint:
// blog_app/routes/ArticleRouter.js
...
router.post("/articles", async (request, response) => {
 ...
});
// Add the following
router.get("/articles", async (request, response) => {
  try {
   const articles = await ArticleModel.find({});
    response.send(articles);
  } catch (error) {
    response.status(500).send({ error });
  }
});
...
The ArticleModel.find() method with the {} argument returns all the articles in the database. Next, you invoke response.send() to return them in JSON format.
To test the endpoint, run the following curl command in the second terminal:
curl http://localhost:3000/api/articles
When curl has no command-line flags, it defaults to sending a GET request.
It will return output matching the following:
[{"_id":"64425979cfca7b6ae9ed5693","title":"First article","content":"Content for the first article","date":"2023-04-21T09:38:01.664Z","__v":0},{"_id":"644259b7cfca7b6ae9ed5695","title":"Second article","content":"Content for the second article","date":"2023-04-21T09:39:03.478Z","__v":0}]
The output shows the two articles we added in the previous section.
Now that we've listed all articles in the database using Mongoose, we can move on to selecting a post by its ID.
GET Endpoint Returning a Single Article By ID
In this section, you will create an api/articles/:id endpoint that takes a custom id parameter which is used to select a specific article in the database by its ID.
In the ArticleRouter.js file, create the endpoint as follows:
// blog_app/routes/ArticleRouter.js
...
router.get("/articles/:id", async (request, response) => {
  try {
    const article = await ArticleModel.findOne({ _id: request.params.id });
    response.send(article);
  } catch (error) {
    response.status(500).send({ error });
  }
});
...
The findOne method takes the ID parameter passed in the URL and returns a single object that matches the parameter id. The object is then returned as a response to the user.
When you finish adding the code, restart the server.
Send a GET request as follows:
curl http://localhost:3000/api/articles/<object_id>
Replace object_id with the IDs shown in the output of the previous section.
The output will show only a single object:
{"_id":"64425979cfca7b6ae9ed5693","title":"First article","content":"Content for the first article","date":"2023-04-21T09:38:01.664Z","__v":0}
With that, let's move on to updating existing data.
Updating Existing MongoDB Data Using PATCH
In this section, you will create an /api/articles/:id endpoint that uses the PATCH method to update existing article data in the MongoDB database using Mongoose.
In the ArticleRouter.js file, add the following code to create the PATCH endpoint:
// blog_app/routes/ArticleRouter.js
...
router.patch("/articles/:id", async (request, response) => {
  try {
    const article = await ArticleModel.findByIdAndUpdate(
      request.params.id,
      request.body
    );
    await article.save();
    response.send(article);
  } catch (error) {
    response.status(500).send({ error });
  }
});
...
findByIdAndUpdate() takes the id parameter to select the object in the database, and then updates it with the data in request.body, which is the second argument.
In the second terminal, run the curl command to send a PATCH request:
curl http://localhost:3000/api/articles/<object_id> \
    -X PATCH \
    -H "Content-Type: application/json" \
    -d '{"title":"Learning Mongoose", "content":"Updated mongoose content"}'
Replace <object_id> with the object's ID of your choosing, which you can see when you send a GET request to /api/articles.
When the command runs, the output will look like this:
{"_id":"64425979cfca7b6ae9ed5693","title":"First article","content":"Content for the first article","date":"2023-04-21T09:38:01.664Z","__v":0}
Verify that the update is successful with the following command:
curl http://localhost:3000/api/articles/<object_id>
{"_id":"64425979cfca7b6ae9ed5693","title":"Learning Mongoose","content":"Updated mongoose content","date":"2023-04-21T09:38:01.664Z","__v":0}
The output shows the article has been updated with the content in the PATCH request.
Now that you can update existing data in the database, you will delete an article in the MongoDB database.
Deleting A Post Using Mongoose's DELETE Method
Finally, you will create an /api/articles/:id endpoint that deletes an article when a DELETE HTTP request is made in Mongoose.
In the ArticleRouter.js, add the following:
// blog_app/routes/ArticleRouter.js
...
router.delete("/articles/:id", async (request, response) => {
  try {
    const article = await ArticleModel.findByIdAndDelete(request.params.id);
    if (!article) {
      return response.status(404).send("Item wasn't found");
    }
    response.status(204).send();
  } catch (error) {
    response.status(500).send({ error });
  }
});
...
The findByIdAndDelete() method looks up the object with the given ID (if it is matched in the database) and deletes it, then returns a 204 status. If the item is already deleted, an Item wasn't found message is returned with a 404 status code.
Run the following command in the second terminal:
curl http://localhost:3000/api/articles/<object_id> -X DELETE -I
The -X DELETE option specifies it to be a DELETE endpoint.
When you run the command, the output will look like this:
HTTP/1.1 204 No Content
X-Powered-By: Express
Date: Fri, 21 Apr 2023 10:06:36 GMT
Connection: keep-alive
Keep-Alive: timeout=5
Monitor Your Mongoose App in Production with AppSignal
To monitor your application once it is live in production, you can use AppSignal. With AppSignal, you can monitor your application's performance, track and log errors, and set up alerts in case of issues. The AppSignal for Node.js integration supports Mongoose, and will automatically instrument the Mongoose client library with no further setup needed.
Once set up, you will be able to see details such as the duration of queries, models used, and operations performed on the models.
Wrapping Up
In this tutorial, you created a CRUD app using Mongoose to save and manipulate data in the MongoDB database. You began by integrating Mongoose with Express. Next, you created the schema for the application. Finally, you created multiple endpoints handling GET, POST, PATCH, and DELETE requests.
Happy coding!
P.S. If you liked this post, subscribe to our JavaScript Sorcery list for a monthly deep dive into more magical JavaScript tips and tricks.
P.P.S. If you need an APM for your Node.js app, go and check out the AppSignal APM for Node.js.